Seasport cabin floor project etc

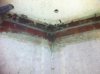
Yes i understand but accually sitting is worse and not being used is worse as they corrode i had volvo penta manifold and they only lasted 5 years only to spray water into cylinders caught it enough time so nothing was hurt but I really dont want you to go down that road very dis concerning they say life is about 5 to 7 years anything beyond that is flirting with danger . where they corrode worse is the lil jackets inbetween riser and manifold as its only about 1/4 inch of metal there.
these new systems have about a inch of metal and use teflon washers where water goes into riser/manifold at the ends of the risers pretty cool system...

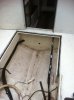
Good luck Wolf BTW great job on what you have done so far looks great
 
I'm in Victoria. Is the water getting in where the hoses pass through the bulkhead? The only hole in my bulkhead is the one for the drain from the cabin floor.
 
Wolf...what should I be checking/looking for when the motor is out as it is? I peared down the outlet pipes and felt around and things seemed pretty good.
 
Profisher...when I tested it the water was coming in at the lowest point of the bulkhead, at the V in the hull. Those hoses by the way (on the port side) are the heat exchanger hoses. I've not seen water come in through there as it would come into the cupboard in the cabin.
 
I go by how old the manifolds are personally if you get 7 years out of them thats VERY good risers about 3 to 5 as i dont like taking chances for the price of it not worth the hassle anymore, I thought my last ones looked great only to find in august that i smelt what was steam one check and yes was getting water in on port side (spark plugs) were getting washed BUT if i didnt notice the harder starting and steam smell could have been alot worse as it was sooo minor in what was happening. just be careful and really watch it can be a bit of a biatch to change later depending on space.
 
I looked up from an old book for the "dry joint" manifold for your V6 and manifolds were 187.56 each and risers were was about 150 bucks and from what ive seen looks like you can get them in aluminum now and that includes all hardware etc.
 
Does anyone have any recomendations on the type of material/product I should use for sealing up the bilge side of my bulk head. The bulk head is leaking at the bottom V where the bulkhead meets the hull. It is hard to see any visible crack but the water came through there at a pretty steady rate when I tested it.
 

Attachments

  • Nov 3 2014 boat work etc 014 (2).jpg
    Nov 3 2014 boat work etc 014 (2).jpg
    93.7 KB · Views: 438
Does anyone have any recomendations on the type of material/product I should use for sealing up the bilge side of my bulk head. The bulk head is leaking at the bottom V where the bulkhead meets the hull. It is hard to see any visible crack but the water came through there at a pretty steady rate when I tested it.

I'd grind/sand out an area a few inches up and a few inches out and then apply fresh fiberglass and epoxy to fillet out the corner. It's not too hard to do, doesn't take too long and you don't have to make it cosmetically attractive in that area. A good fiberglass fillet will last a very long time.
 
Seadna, thank you for the advice. I was thinking that was one of the main ways to go but wasn't sure if there was some product you could just brush on that would do the same thing.
 
Seadna, thank you for the advice. I was thinking that was one of the main ways to go but wasn't sure if there was some product you could just brush on that would do the same thing.

If there is a crack it means there may be some stress in that area. I would not trust a brush on coating. Some resin and matting and your healed.
 
glass for sure use an epoxy resin as it has the best secondary bonding follow these steps below for a bomb proof repair
1. grind back from he crack 2-3 inches to expose fresh glass and remove all gel coat with an angle grinder and a 36 grit disc
2. mix a peanut butter mixture with silica, glass fibers and epoxy
3. use this mixture to build a nice fillet in the corner where your crack was use about a 1" radius on the fillet. this will allow your glass to bend nicely into the corner
4. use some 4-6" wide 1708 biax fiberglass tape to build reinforce the cracked area, make sure you buy one of the small alumium rollers to remove air bubbles from your layup
5. start with a 6" wide piece then a 4 inch wide piece to build up some strength
6. allow to cure untill the epoxy is firm but not hard and add a few more coats of resin.
7. sand resin with 100 grit and paint with bilge paint for looks or just leave it.

done and done....
 
See below and follow his instructions. Not hard to do. I use a 4" cheap grinder with a rubber backing pad and 60 grit disks. I have ground out the end of a 1" hand scraper to make it circular to apply the "peanut butter mixture" in a nice concave pattern.

Stop at Independent Shipwrights to get your supplies. Fiberglass smells bad but is actually an easy product to work with as long as your prepare your surfaces.


glass for sure use an epoxy resin as it has the best secondary bonding follow these steps below for a bomb proof repair
1. grind back from he crack 2-3 inches to expose fresh glass and remove all gel coat with an angle grinder and a 36 grit disc
2. mix a peanut butter mixture with silica, glass fibers and epoxy
3. use this mixture to build a nice fillet in the corner where your crack was use about a 1" radius on the fillet. this will allow your glass to bend nicely into the corner
4. use some 4-6" wide 1708 biax fiberglass tape to build reinforce the cracked area, make sure you buy one of the small alumium rollers to remove air bubbles from your layup
5. start with a 6" wide piece then a 4 inch wide piece to build up some strength
6. allow to cure untill the epoxy is firm but not hard and add a few more coats of resin.
7. sand resin with 100 grit and paint with bilge paint for looks or just leave it.

done and done....
 
The one item mikep didn't add in at the end of his glassing instructions is one I would suggest and that is to use some gel coat as your "final" coat but you have to add in some air dry wax. I don't like to paint fiberglass as paint and fiberglass don't adhere really well. I get a small amount of gel coat, mix it with some resin and if you add the wax (in the final coat only) the finish is not tacky. Fibreglass without wax is tacky and picks up dirt etc easy.

See below and follow his instructions. Not hard to do. I use a 4" cheap grinder with a rubber backing pad and 60 grit disks. I have ground out the end of a 1" hand scraper to make it circular to apply the "peanut butter mixture" in a nice concave pattern.

Stop at Independent Shipwrights to get your supplies. Fiberglass smells bad but is actually an easy product to work with as long as your prepare your surfaces.
 
Good thread. Good for you MRW, it's noit easy to just suck it up and go through with a big rebuild like this. I went through transom and stringer rebuild last year, I feel your pain.
 
You can't gel epoxy only works for polyester resin. For this repair I would use epoxy. West systems or systems 3.
 
I was recommended by the fellow at Independent Shipwrights to use the polyester resin (fiberlay ortho lamination resin P-16). He also told me that I didn't really need to make a fillet out of resin putty. However, once I ground things down the cracks became more exposed and larger than I originally thought. Therefore I made a putty out of the dust from the grindings and I cut up little pieces of the fiberglass matt with scissors and mixed with the resin. Here is my first fillet :)
 

Attachments

  • 008.jpg
    008.jpg
    96.9 KB · Views: 358
I then started to lay the glass matting, two layers with some diamond shaped cuts for the bottom of the V. Here is the finshed glass work. Finished it all up this afternoon. Will wait till it cures and then put a layer or two of bilge paint and then the gas tank can go back in.
 

Attachments

  • 010.jpg
    010.jpg
    96 KB · Views: 359
Back
Top