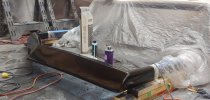
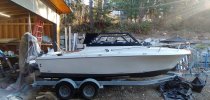
You can always reduce the gel with Duratec and catalyze accordingly should give an awesome product with higher durability and more room for error. IF you like paint then that is great too of course. I'm just too hard on things to have a pretty boat with paint and my fairing isn't good enough LOL.
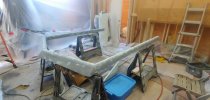
As for the pod, I also moved fuel forward on mine. Maybe not as far. Are you planning that the tanks will go into the galley area? That could work well for the CG. If you're just moving them forward in the back deck it won't be enough from my experience. The safe bet is the full planning pod and you get the added benefit of more static flotation and better manors in swell etc. I believe the cons of a full planning pod are heavily outweighed by the pros. Totally your call. keep up the good work. Glad I'm not the only muppet playing with fiberglass in my free time.

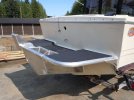

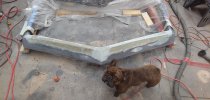
") Does the boat have saddle tanks and a center tank? A cool thing a friend told me is you can move the saddle tanks ahead to bump the CG forward. The Center tank is difficult to get more forward than the center bulkhead and would make headroom an issue. If it was me I would just make the center tank as big as possible from transom to center bulkhead and rely more on the full planning pod to give you more stern lift and play with the saddle tanks if you have them. I really wish I had made my saddle tanks longer and further forward that was an error on my part.
Does the boat have saddle tanks and a center tank? A cool thing a friend told me is you can move the saddle tanks ahead to bump the CG forward. The Center tank is difficult to get more forward than the center bulkhead and would make headroom an issue. If it was me I would just make the center tank as big as possible from transom to center bulkhead and rely more on the full planning pod to give you more stern lift and play with the saddle tanks if you have them. I really wish I had made my saddle tanks longer and further forward that was an error on my part.