
You are using an out of date browser. It may not display this or other websites correctly.
You should upgrade or use an alternative browser.
You should upgrade or use an alternative browser.
1981 Double Eagle gets a second chance
- Thread starter DanJ
- Start date
-
- Tags
- 1981 double eagle
DanJ
Well-Known Member
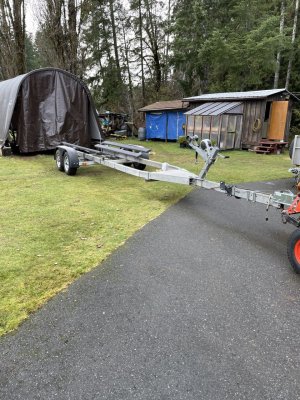
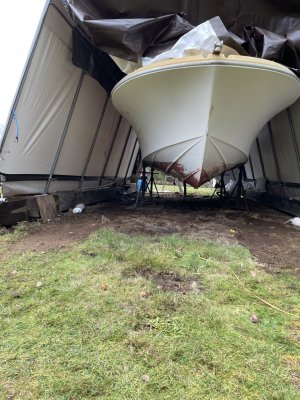
Today was I was busy all day but felt like I barely got anything done. Aligning the outboards and torqued them To 55 ft/lbs as per manufacturer recommendations. Then I lifted the boat and removed the trailer so I can start cleaning up the bottom. I also started the install of the Seastar steering system.
Attachments

Salmonslayer1992
Crew Member
I just want spring to hurry up and get here so I can see our boat with paint all finished and ready to slay some some fish and carve through some swells.Merry Christmas everyone. I hope your tree has a plethora of boat parts underneath and your stocking are overflowing with the newest electronic devices.


Salmonslayer1992
Crew Member
And a merry Xmas to you to!I just want spring to hurry up and get here so I can see our boat with paint all finished and ready to slay some some fish and carve through some swells.
DanJ
Well-Known Member
I look forward to catching up with you as we sand the bottom of the hull for hours on end. LOL.I just want spring to hurry up and get here so I can see our boat with paint all finished and ready to slay some some fish and carve through some swells.
Salmonslayer1992
Crew Member
Hahaha! I’d honestly be happy too help, I’m living in Powell River though. I’m sure it’ll be flawless by the time you’re finished. I love that boat though and definitely appreciate all the work that you’ve put into it. Awesome too bring it back too life.I look forward to catching up with you as we sand the bottom of the hull for hours on end. LOL.
DanJ
Well-Known Member
Thank you.Hahaha! I’d honestly be happy too help, I’m living in Powell River though. I’m sure it’ll be flawless by the time you’re finished. I love that boat though and definitely appreciate all the work that you’ve put into it. Awesome too bring it back too life.
Sttr
Crew Member
Looking great Dan,It will get a full spray job once the weather permits. Also waiting to spray it before windows go in.
9-10 degrees for the next week, maybe a few degrees short, but spring is trying to poke its head thru and push winter out of the way!
Have you decided what you are going to paint with?
DanJ
Well-Known Member
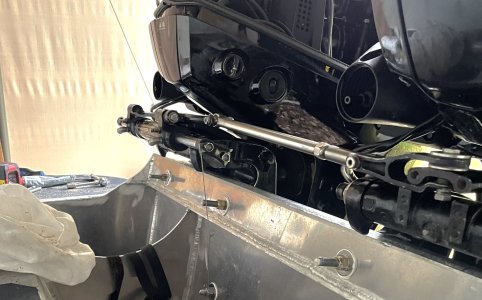
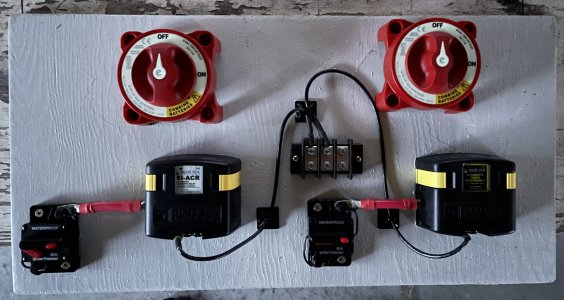
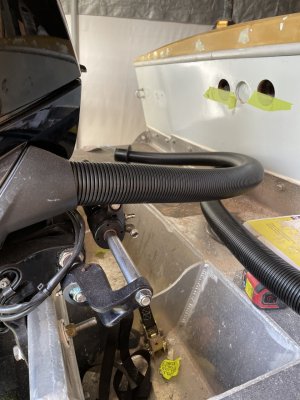
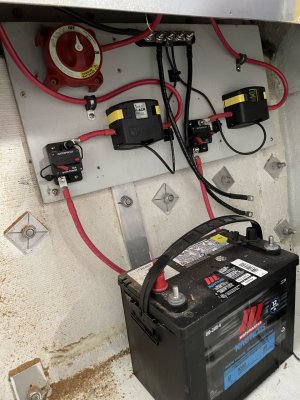
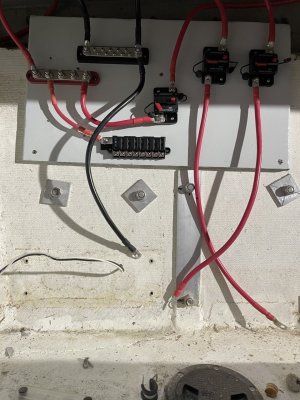
Starting the job of wiring. Setting up to have two starting batteries and a house battery. I also worked on the steering and it seems to be working perfect in regards to tilting each motor individually or together I will try and get a better picture as I made a change after the picture was taken. I added an extension bracket to the second motor and that allowed for a better fit
Attachments
Oscar162
Well-Known Member
Looking good Dan.... I'm starting to fumble through wiring as well. How close are your batt's to the 80a fuses you have protecting your ACR's? Just working on figuring things out myself... from my research the breakers/fuses are there to protect the run from the batts to the ACR's. I'm installing the terminal mounted fuses (MRBF) direct on the pos batt terminals to protect the entire length... but I'm no electrician. How did you come up with 80amp breakers as the appropriate size? Cheers, OscarStarting the job of wiring. Setting up to have two starting batteries and a house battery. I also worked on the steering and it seems to be working perfect in regards to tilting each motor individually or together I will try and get a better picture as I made a change after the picture was taken. I added an extension bracket to the second motor and that allowed for a better fit
DanJ
Well-Known Member
I used the Blue Sea Systems Wizard app that you can download. My first start battery will be about 12-15 inches away and the other maybe 3 feet. My house battery will be up front and I will install that breaker up front as well.Looking good Dan.... I'm starting to fumble through wiring as well. How close are your batt's to the 80a fuses you have protecting your ACR's? Just working on figuring things out myself... from my research the breakers/fuses are there to protect the run from the batts to the ACR's. I'm installing the terminal mounted fuses (MRBF) direct on the pos batt terminals to protect the entire length... but I'm no electrician. How did you come up with 80amp breakers as the appropriate size? Cheers, Oscar
DanJ
Well-Known Member
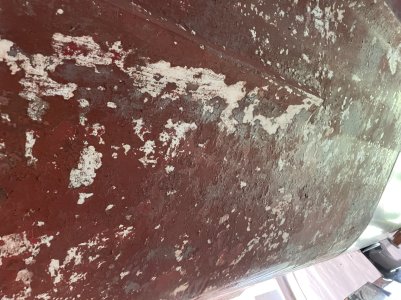
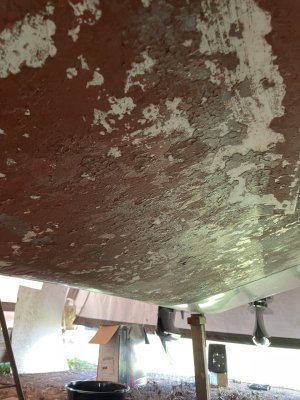
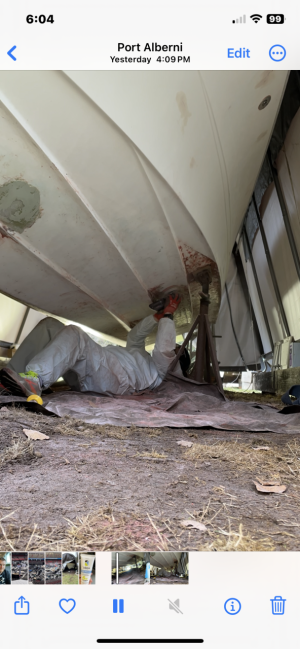
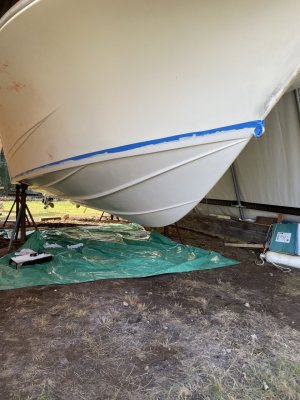
It was a cool day today so no better time then now to start scraping bottom paint off. I tried sanding it but it is so thick it takes quite a while to just work your way through it. So I tried scraping it first then sanding and that works like a hot damn. Scrapped about 70% today lying on my back then sanded about 20% of that. When I was sanding, I was coming across these dark spots and I thought I had sanded through the gel coat and I was seeing fibreglass but wasn’t too worried as I was gonna recoat the bottom anyways but when I went to clean with some acetone, the dark spots turned into a heck of a mess. It was almost like there was tar on the bottom of the boat, and they just bottom painted right over top of it, the acetone would cause it to smear around and took quite a few wipes to fet it off so I think I’m in for a bit of a challenge just cleaning up the bottom so I can start putting some epoxy primer down. The joys of fixing somebody else’s work.
Attachments
DanJ
Well-Known Member
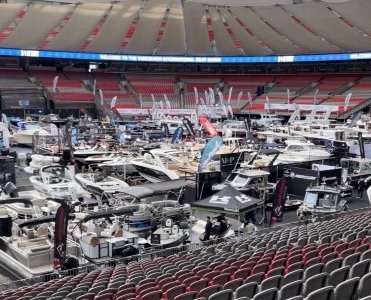
Took a day and went to the boat show on Sunday. Seems like there was less vendors there this year. Nice selection of boats on display though. I hopped on a new 206 Double Eagle priced just over 100g. It looked to me prices were higher this year but then discounted. I am happy I went the route I did with the build as I will own it outright and it will be very fishy. Loads more dance floor than the new Double Eagle style
Attachments
DanJ
Well-Known Member
DanJ
Well-Known Member
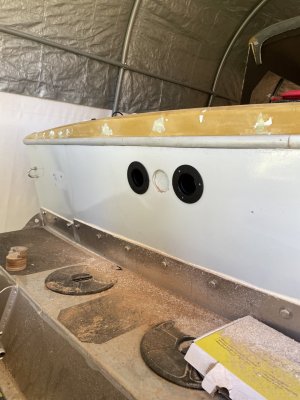
So what did today have to offer. Well more sanding on the bottom paint. I have about 6hrs of sanding the bottom under my belt that does not include the 3 or 4 hrs of scraping I did first. I should be finished the next go round. I also worked some more on the wiring. Just loosely running stuff for now to get my lengths figured out and will make it all pretty later. All wire ends are tinned copper closed end and soldered on coved by a heat shrink. Also picked up my controls and gauges. Sc1000 smartcraft tachs and speedo. Cut the holes for the rigging tubes and coated them with epoxy (hence the green tape keeping it from dripping out.) getting so close spring is going to be awesome this year.
Attachments
DanJ
Well-Known Member
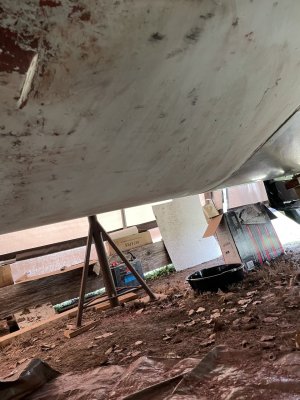
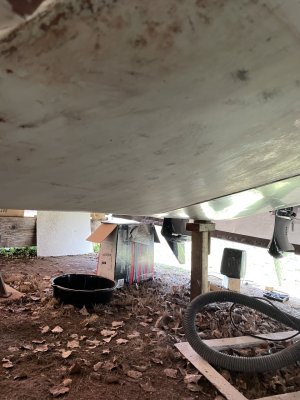
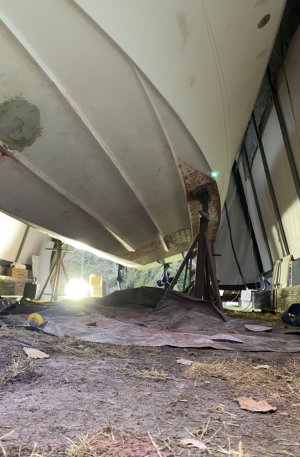
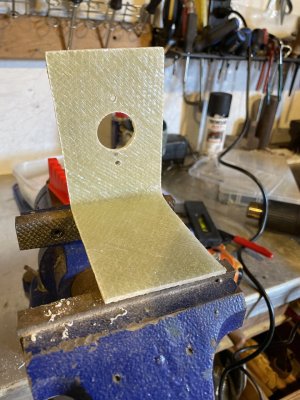
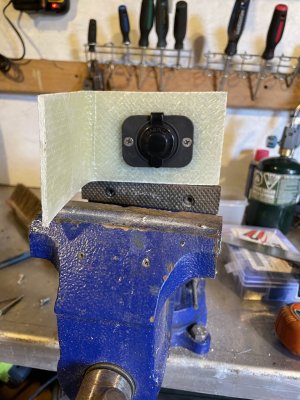
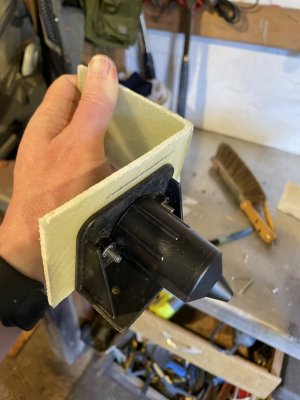
Its nice to have the weather back on our side. I was able to give the hull a good scrub then wiped it down with acetone. Weather was great so I put down the first coat of epoxy primer, I will put 3 or 4 coats on. I also started working on the brackets for the Scotty Downrigger plugs. All in all I am happy with today’s progress
Attachments
Similar threads
- Replies
- 2
- Views
- 389
- Replies
- 5
- Views
- 996
- Replies
- 12
- Views
- 2K
- Replies
- 9
- Views
- 1K
- Replies
- 13
- Views
- 1K