23' & 26' Hourston Project Commenced...

What to do?

  • Try and keep the boat and complete the project.

    Votes: 71 71.0%
  • Sell the boat in current hot market.

    Votes: 8 8.0%
  • Notch the transom for outboard.

    Votes: 5 5.0%
  • Add extension bracket for outboard.

    Votes: 57 57.0%
  • Install twin outboards.

    Votes: 42 42.0%
  • Install single outboard.

    Votes: 27 27.0%
  • Add command bridge.

    Votes: 15 15.0%
  • Remove command bridge.

    Votes: 42 42.0%
  • Accept "crowd funding"

    Votes: 29 29.0%
  • Do not accept "crowd funding"

    Votes: 16 16.0%

  • Total voters
    100
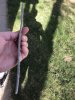
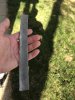
I don’t have a part number. It’s a gasket for a CR Laurence / US Aluminum 7200 series window. CRLaurence has a facility in Calgary so maybe you could phone them and get contacts for some glaziers out your way that might have stock of it. I doubt CRL would sell you a small amount of it.

otherwise I have about 1500’ of it here and haven’t used it in over ten years so I can ship some to you if need be.

Thx @Corey_lax I have an email gone into AdvanTec for this, I if can't just buy 30' ill try the stuff you have, which I think will work. Thank you
 

Attachments

  • Screen Shot 2020-05-13 at 2.19.45 PM.png
    Screen Shot 2020-05-13 at 2.19.45 PM.png
    76.9 KB · Views: 17
Last edited:
Hey @Corey_lax I am also looking for some flat gasket 1" x 3/8" or 5/16", I emailed Faucher Industries on this one, do you have anything link this, it can also be wider than 1", up to 2" will do, I will jut trim the excess off.
 

Attachments

  • Screen Shot 2020-05-13 at 2.18.14 PM.png
    Screen Shot 2020-05-13 at 2.18.14 PM.png
    1.3 MB · Views: 20
Hey @Corey_lax I am also looking for some flat gasket 1" x 3/8" or 5/16", I emailed Faucher Industries on this one, do you have anything link this, it can also be wider than 1", up to 2" will do, I will jut trim the excess off.

Reply:
Hi,
In stock in Edmonton
Minimum 8rls at $17.83/rl.

Looks like I have to order 8 reels, assuming 8 reels in a box :)
 
I think that is a soft spongy weatherstripping gasket. Is that what you are expecting or something more dense and sticky on both sides? You can get the single sided sticky weatherstripping from basically any hardware store or Canadian Tire.
 
I think that is a soft spongy weatherstripping gasket. Is that what you are expecting or something more dense and sticky on both sides? You can get the single sided sticky weatherstripping from basically any hardware store or Canadian Tire.

That is correct, I am looking for tape that is semi UV resistant, not sure if Canadian Tire or Home Depot stuff is, i will look into it. The stuff that I removed is a grey very dense cell foam tape that appears to be sticky on at least one side...

I have seen some of that black stuff turn all crumbly and hard in a short time :(
 

Attachments

  • IMG_0185.jpeg
    IMG_0185.jpeg
    642.2 KB · Views: 54
  • IMG_0183.jpeg
    IMG_0183.jpeg
    347.6 KB · Views: 54
  • IMG_0184.jpeg
    IMG_0184.jpeg
    399.4 KB · Views: 54
Last edited:
Well its been awhile and kinda bored today so just threw together a quick vid...

 
Last edited:
I decided to just keep going the way I was :), topside of roof all sanded with 120gr and faired, ill do 220 and 320 tomorrow and go over it once more with the light, then ready for primer/paint with some non-skid of course :D

IMG_0191.jpeg IMG_0192.jpeg
 
Last edited:
Ready for paint, went over the roof 3 times with trouble light and fairing in-fills, sanded with 220 and cleaned with acetone... Now what paint will I use, hummm o_O Definitely not spending an arm & a leg on the paint or paying to get it sprayed!

IMG_0193.jpeg IMG_0194.jpeg
 
Last edited:
I know I am not in the club yet but its a start... :) haha

IMG_0195.jpeg
 
Looking good! Next some Skinny g’s and AP sandlances/coho killers and some Rhys Davis no bananas teaser heads and you’re set!
 
I don't have a ton of AP gear but the sandlance is a go-to for early winter springs on my boat.
 
I was hopeful that this was the last and final sand & prep before paint, but unfortunately not. After I applied the dry guide, boy-O-boy it revealed allot of scratches during the 32ogrit sanding, so had a few more pits that needed attention before final :) it should be 100% now :D and ready for primer/paint...
 

Attachments

  • IMG_0204.jpeg
    IMG_0204.jpeg
    436.4 KB · Views: 123
  • IMG_0205.jpeg
    IMG_0205.jpeg
    543.8 KB · Views: 118
  • IMG_0209.jpeg
    IMG_0209.jpeg
    614.6 KB · Views: 115
  • IMG_0212.jpeg
    IMG_0212.jpeg
    285.4 KB · Views: 116
  • IMG_0214.jpeg
    IMG_0214.jpeg
    535.7 KB · Views: 118
  • IMG_0215.jpeg
    IMG_0215.jpeg
    157.1 KB · Views: 128
I have much appreciation for your patience.. This is a big surface and deciding to do yet another build up and knock down after thinking you were done is a very strong internal moral debate :p. Awesome stuff
 
Sucker for punishment, but a eye for quality and if you are going to do a job you should do it right. Great job.
 
I’m
Once again impressed. Nice work.

Pep is 95% of the final products outcome! I know it's ONLY a roof and most of the surface will end up being non-skid but gots to try and give everything the same level of finish... :)
 
Getting ready to do the prep for hull/topside and bottom for paint. I have the sides sanded to 150grit and will finish with a 320grit, the bottom is being cleaned up by using paint remover. I am using Dumond SmartStrip available at Rona, I done a test and it seems to work pretty good with 2 coats, although I think PeelAway would work as well according to the reviews I found.

The water line and boot-stripe looked to be not at all where they are suppose to be so will need to confirm location down the road :)

I am thinking on using Interlux CSC for bottom paint as it can be hauled and relaunched without re-coating, I need something that is bunk-trailer friendly and will not peel if not in water... any opinions?
 

Attachments

  • Webversion_3-MicronCSC_1GLUS_16B_3D.png
    Webversion_3-MicronCSC_1GLUS_16B_3D.png
    304.1 KB · Views: 105
  • IMG_0224.jpeg
    IMG_0224.jpeg
    316.4 KB · Views: 109
  • IMG_0220.jpeg
    IMG_0220.jpeg
    266.2 KB · Views: 112
  • IMG_0222.jpeg
    IMG_0222.jpeg
    321.8 KB · Views: 106
  • IMG_0221.jpeg
    IMG_0221.jpeg
    206.4 KB · Views: 105
  • IMG_0223.jpeg
    IMG_0223.jpeg
    412.4 KB · Views: 108
  • images.jpeg
    images.jpeg
    7.8 KB · Views: 101
Last edited:
Back
Top