DanJ
Well-Known Member
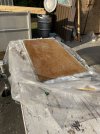
I think my MEKP was bad. It was waxed gel coat and it was definitely thick enough. Also Humidity was good so other than it being a pain in the butt to remove and start over its no big deal. I will do a test with new MEKP to make sure. It was a new can of gel coat.Might be an obvious question, but is your gelcoat waxed? Unwaxed poly resin or gel will forever be tacky to the touch, until it’s gone over with waxed product or PVA. Also gelcoat needs to go on fairly thick to actually kick off and set up properly. Temp and catalyst plays a roll too as I’m sure you know. I’ve found out the hard way myself more than once HA