
You are using an out of date browser. It may not display this or other websites correctly.
You should upgrade or use an alternative browser.
You should upgrade or use an alternative browser.
Why I'm not on the water yet!
- Thread starter Sculpin
- Start date
Bassblaster
Active Member
Damn Holmes, you always manage to find the good stuff!
Sculpin
Well-Known Member
Well the fuel tank chamber is all cleaned up and tank is back in. I used Sikaflex in aluminum gray color to seal it back in. I think a got a really good seal with just enough oozing out nice and even all around.
Just have to hook it all up and find some dielectric silicon for the sending unit. I hope to take her for a spin tomorrow in Departure Bay for some sea trials.
Just have to hook it all up and find some dielectric silicon for the sending unit. I hope to take her for a spin tomorrow in Departure Bay for some sea trials.
Sculpin
Well-Known Member
Another fellow did the electrical for me Gunsmith. I zap strapped everything though.
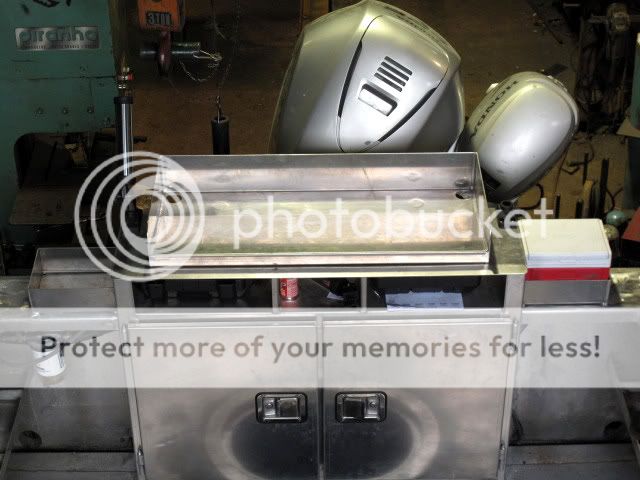
Whipped up the removable fish cleaning table this afternoon.
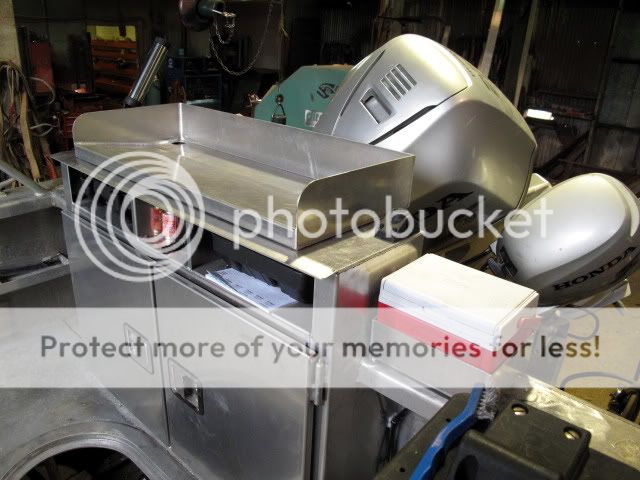
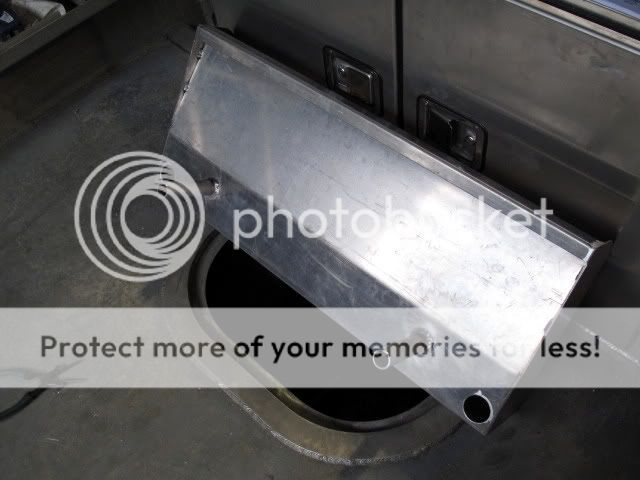
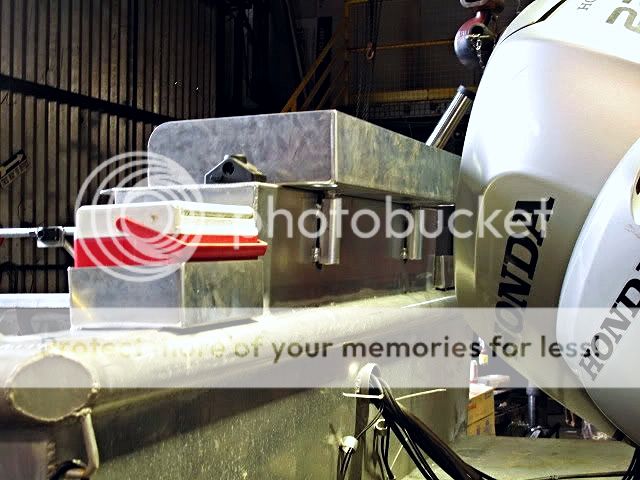
I will mount some cutting board material on the sloped front portion for filleting etc. drill and tap the board and mount from underneath with counter sunk bolts.
I mounted two bait cooler holders as well. Starting to look "busy" back there but oh well. Anchovies and Herring for both sides of the boat!!!
Whipped up the removable fish cleaning table this afternoon.
I will mount some cutting board material on the sloped front portion for filleting etc. drill and tap the board and mount from underneath with counter sunk bolts.
I mounted two bait cooler holders as well. Starting to look "busy" back there but oh well. Anchovies and Herring for both sides of the boat!!!
Time
Well-Known Member
Been following your progress Sculpin, very impressive.
Lots of thought and design in there, everything looks good.
Great workmanship too.
But you p' me off by with "Whipped up the removable fish cleaning table this afternoon."
Thats a winters work and multi hundred dollars to get it right for some of us.
Just kidding.
It's turning out beautiful.
Keep posting and waiting for a grand photo tour of all your innovations when you are satisfied.
Sculpin
Well-Known Member
Been following your progress Sculpin, very impressive.
Lots of thought and design in there, everything looks good.
Great workmanship too.
But you p' me off by with "Whipped up the removable fish cleaning table this afternoon."
Thats a winters work and multi hundred dollars to get it right for some of us.
Just kidding.
It's turning out beautiful.
Keep posting and waiting for a grand photo tour of all your innovations when you are satisfied.
Thanks Time
 .
.I hope some folks walk away with the fun factor of this thread and the realization that aluminum is a great material for boats and especially unpainted aluminum for modifications etc. I also hope it sparks others into posting up modifications and projects with lot's of pictures for others to see, enjoy, and learn from
.Non skid is next.........
Last edited by a moderator:
LiquidGuides01
Member
Thats a fine looking fishing vessel Sculpin! Real nice job on the aluminum work, Nice welds BTW.
Real nice setup you got there its definitily worth the wait!
Real nice setup you got there its definitily worth the wait!
Sculpin
Well-Known Member
Been too busy at work and didn't make it out last weekend.
Well the tank went back in really nice and I think I got a great seal on her now.
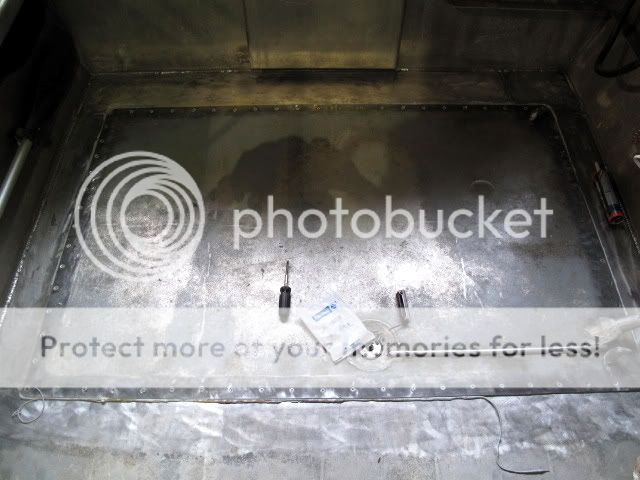
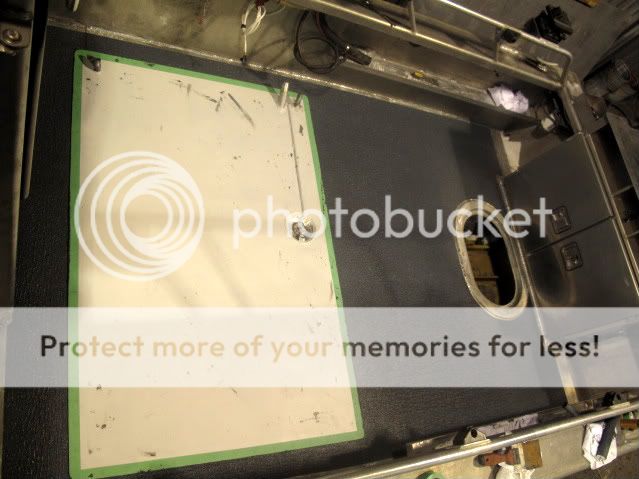
I sanded off all the existing (what was left) non skid paint and did one wash with Xylene and a second wash with warm water. I hand dried it with cloths and air. The air works great in the cracks and cranny's that you can't get to with a towel.

All masked up and ready for epoxy primer.
I would have put the primer on tonight but the buggers gave me the wrong catalyst or "part b"
 . Primer goes on tomorrow morning and the non skid goes on tomorrow night hell or high water!
I have to have this rig ready to go for the long weekend!!!!
Well the tank went back in really nice and I think I got a great seal on her now.
I sanded off all the existing (what was left) non skid paint and did one wash with Xylene and a second wash with warm water. I hand dried it with cloths and air. The air works great in the cracks and cranny's that you can't get to with a towel.
All masked up and ready for epoxy primer.
I would have put the primer on tonight but the buggers gave me the wrong catalyst or "part b"
I have to have this rig ready to go for the long weekend!!!!
scott craven
Well-Known Member
Do you have any concern about having access to your motors while on the water ?
looks like it may be awkward with the height of the cabinet.
looks like it may be awkward with the height of the cabinet.
Sculpin
Well-Known Member
Do you have any concern about having access to your motors while on the water ?
looks like it may be awkward with the height of the cabinet.
I don't think the cabinet is an issue but the bait coolers are. They are just tacked on so I may cut one off. Probably the kicker side one. I very rarely have to go back on the swim platform but over the transom between the rail and cabinet is how I have to get back there. Good point r.s.
Sculpin
Well-Known Member
OMG someone stole my windows!!!
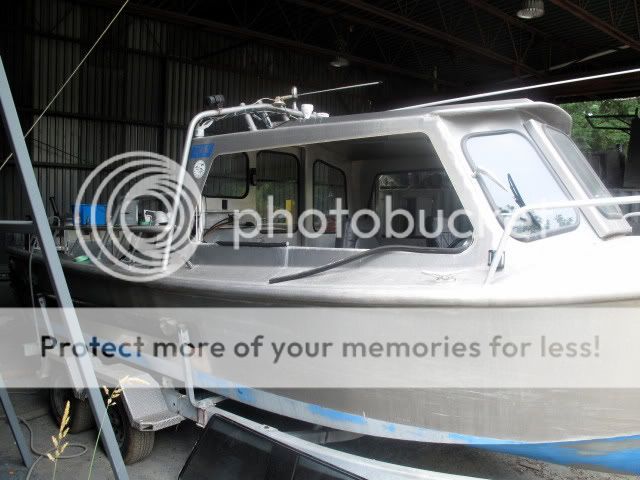
My side windows used to leak quite bad and I have always wanted to fix them. The original install wasn't so stellar. I'm having a window guy reinstall new rubber frames and seal them properly this time.
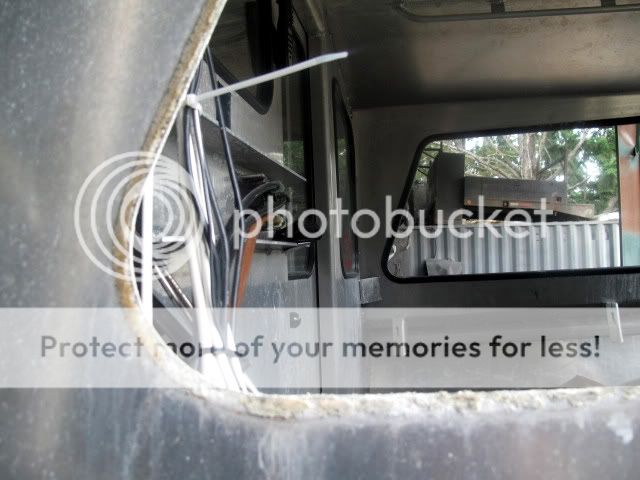
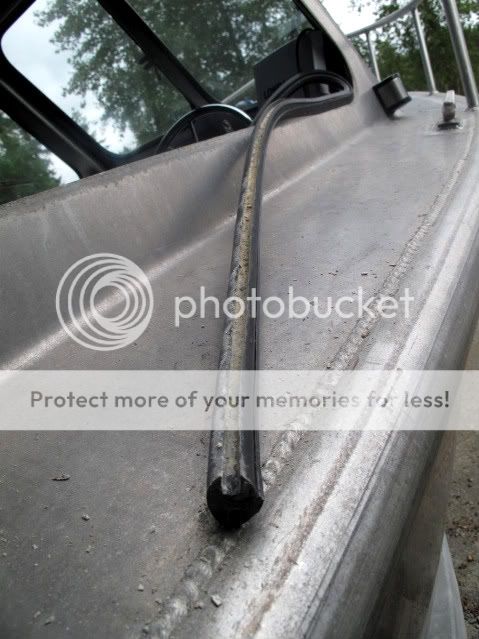
He will clean up the edges of the openings for proper bond and sealing. Should all be back in this evening. The front and back single non sliding windows are fine.
One more thing off the list.
My side windows used to leak quite bad and I have always wanted to fix them. The original install wasn't so stellar. I'm having a window guy reinstall new rubber frames and seal them properly this time.
He will clean up the edges of the openings for proper bond and sealing. Should all be back in this evening. The front and back single non sliding windows are fine.
One more thing off the list.
wildwest
Active Member
Looks like an A1 rig ready for the water.Just a question about getting a new looking GLEAM to aluminum hull and stuff[I always wondered the PRO way of somehow getting a real nice new look of salted aluminum oxidation]...I have a gelcoated boat but always wondered whats best ...maybe glass bead or something around like that??
Sculpin
Well-Known Member
Looks like an A1 rig ready for the water.Just a question about getting a new looking GLEAM to aluminum hull and stuff[I always wondered the PRO way of somehow getting a real nice new look of salted aluminum oxidation]...I have a gelcoated boat but always wondered whats best ...maybe glass bead or something around like that??
On a raw aluminum boat the oxidation acts as a protectant. Some of the fancier boats use a high performance paint system on the hulls. A fairly popular way to go is is to acid wash the hull and then use Shark Hide which is a clear protectant. The down side to paint or Shark Hide is that it shows scratches quite easily.
The inside of my cab is raw aluminum and I just use Colenites wax and buff it up a bit to make it look a little shinier.
Sculpin
Well-Known Member
I put the epoxy primer on last night and let if cure 24 hrs. peeled the tape and gave it a light sand and re-taped.
We put the non-skid on tonight and I think it will be good for my purposes. It is some serious stuff and quite aggressive. We don't go bare foot up here very often in Canuck land and I have never had anyone in bare feet on my boat yet. Rubber boots all the way. I wouldn't want to do a face plant on the deck that is for sure. Put it this way......nobody is going to slip.
I should have bought two 1 gallon kits because we came out short. We did everything except the tank. My buddy figured leave the tank so no tie in marks show anywhere. Good idea me thinks. I will do the tank tomorrow morning.
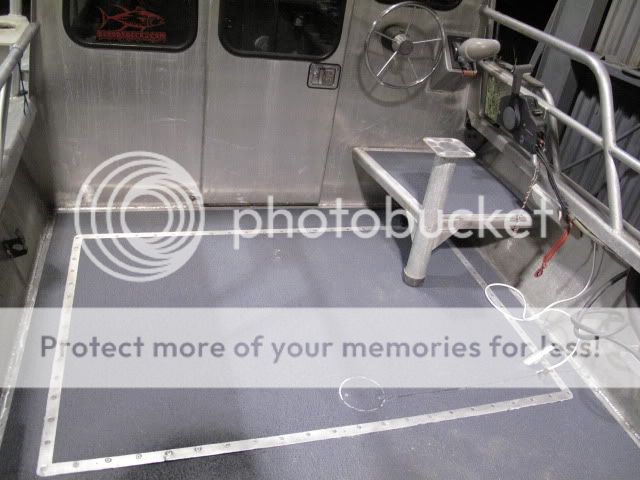
This is my rear steering station platform that a swivel seat attaches to. You can see the profile of the non skid quite good in this shot.
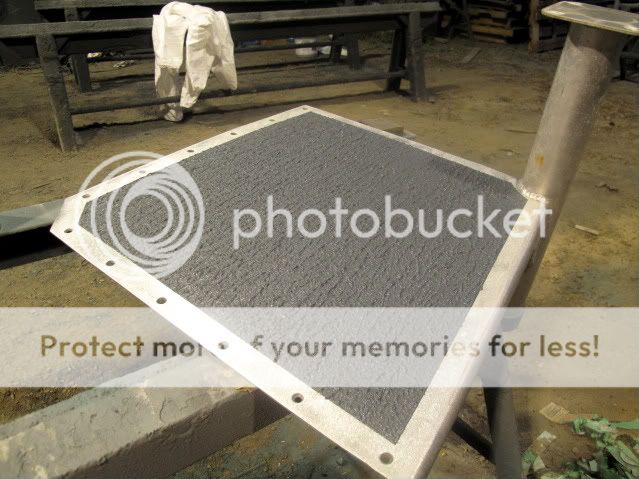
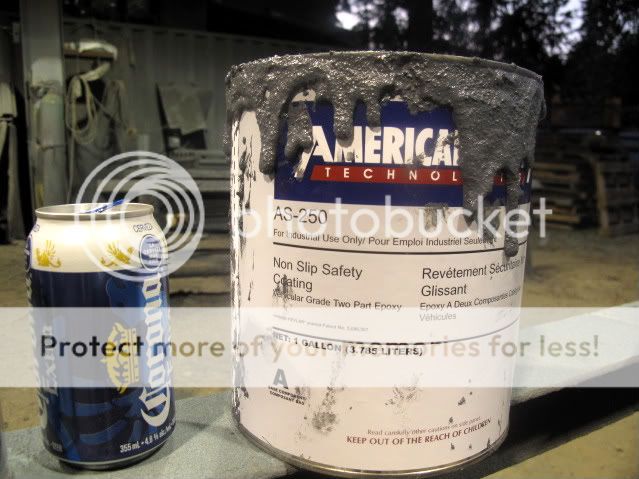
This is the stuff I used. American Safety. It is the original formula that was used on US aircraft carriers. From my understanding they used a different formula now but same company. I figure a battleship of a boat needs a battle ship deck coat.
The swim platform, side rails, and bow will get the same treatment next spring (early spring ha ha).
I have a 130 dollar gallon of Kiwigrip tinted to battleship grey that I will be donating to the fundraiser for the Nanaimo Fish Hatchery at the Harbour Chandler in September. Just a heads up.
Cheers,
Sculpin
We put the non-skid on tonight and I think it will be good for my purposes. It is some serious stuff and quite aggressive. We don't go bare foot up here very often in Canuck land and I have never had anyone in bare feet on my boat yet. Rubber boots all the way. I wouldn't want to do a face plant on the deck that is for sure. Put it this way......nobody is going to slip.
I should have bought two 1 gallon kits because we came out short. We did everything except the tank. My buddy figured leave the tank so no tie in marks show anywhere. Good idea me thinks. I will do the tank tomorrow morning.
This is my rear steering station platform that a swivel seat attaches to. You can see the profile of the non skid quite good in this shot.
This is the stuff I used. American Safety. It is the original formula that was used on US aircraft carriers. From my understanding they used a different formula now but same company. I figure a battleship of a boat needs a battle ship deck coat.
The swim platform, side rails, and bow will get the same treatment next spring (early spring ha ha).
I have a 130 dollar gallon of Kiwigrip tinted to battleship grey that I will be donating to the fundraiser for the Nanaimo Fish Hatchery at the Harbour Chandler in September. Just a heads up.
Cheers,
Sculpin
Last edited by a moderator:
Sculpin
Well-Known Member
ya, i dont think a face plant would be to healthy for the face, kinda like going through a cheese grater,lol....holmes*
Ha ha. Rough but not cheese grater rough holmes
! It knocked down a tiny bit since it's curing. Speaking of curing......I didn't read the fine print on the product data sheet and it says to not expose to heavy amounts of water for 5-7 days!!!!! That kind of threw a damper on the long weekend
. We are heading up to our lot at Salmon Beach and I was racing to get the boat ready to finally get out on the water.Not all is lost as I talked to a guide buddy in Tofino and he's taking my son, my son's buddy, and myself out on Monday morning
.I got the tank non skid coated this evening. A fishing buddy came over and changed all the motor oils etc. Engines look great. Gotta love the Honda's. My window guy got the windows back in and they should be way better than the original install. Shouldn't leak now (knock on aluminum).
Last edited by a moderator:
Sculpin
Well-Known Member
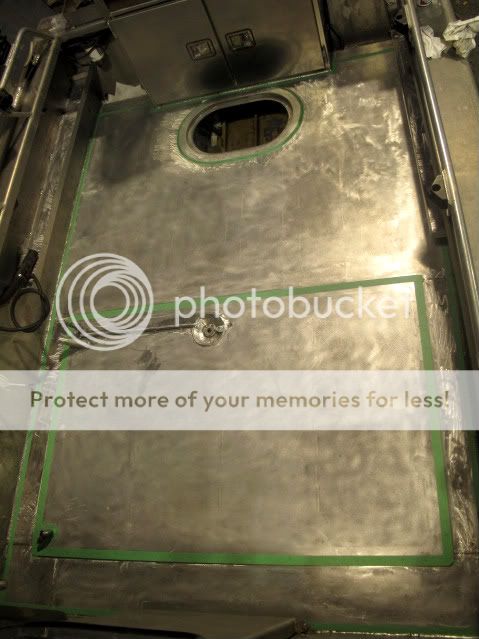
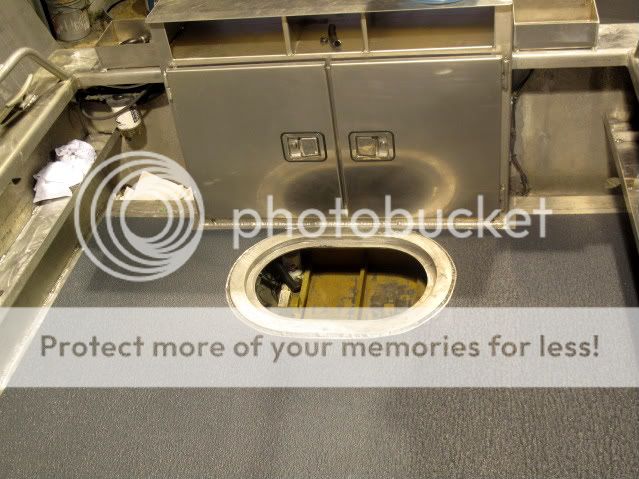
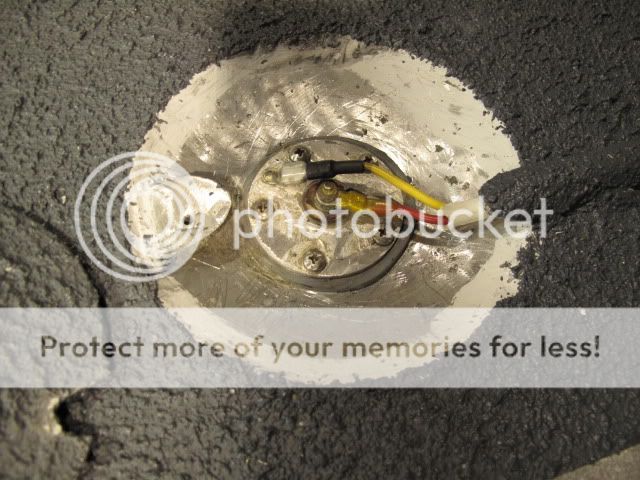
Ok here is the low down on the sending unit design on the top of my fuel tank..............it sucks big time. I have done this once before on it because the gauge didn't work when I bought the boat. It worked fine after I did it the first time. I had to scrape it all out when I removed the tank to see what was in the chamber.
Here it is wired back in.
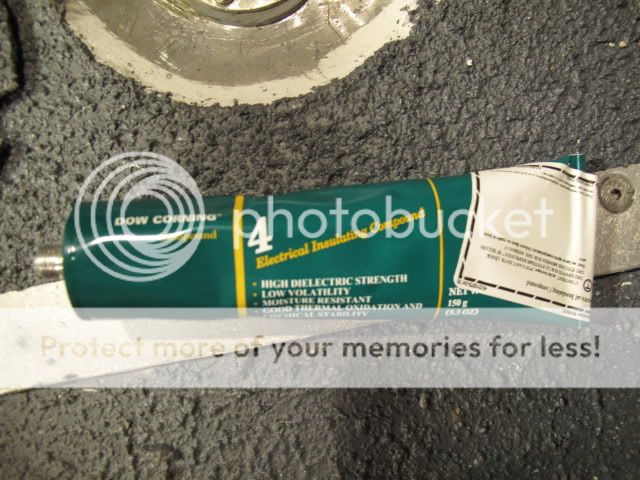
I use this dielectric silicone compound to seal the entire assembly (I don't know what else to do and it worked great the first time).
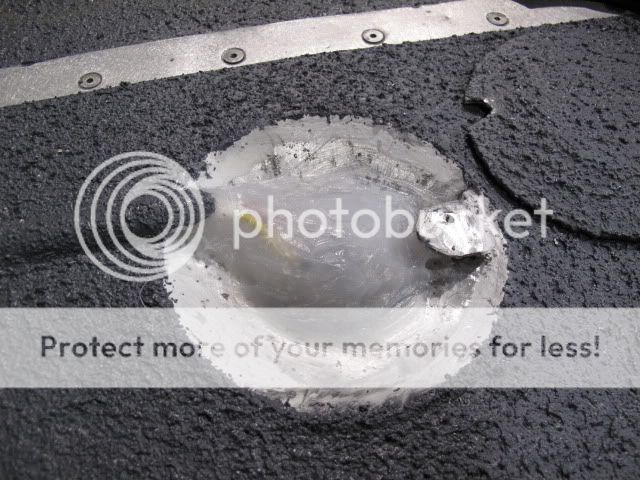
All gooped up(I put another tube in there and topped it right up to the cap).
Steering platform back in. Just have to hook up the tank hoses and fill the tank (dreading that...ha ha).
Still have to deal with inside the cabin next and get everything tidy and put back together in there.
The non skid cured hard as a rock over the long weekend. The paint rep said I should get up to 15 years life out of it!
Here it is wired back in.
I use this dielectric silicone compound to seal the entire assembly (I don't know what else to do and it worked great the first time).
All gooped up(I put another tube in there and topped it right up to the cap).
Steering platform back in. Just have to hook up the tank hoses and fill the tank (dreading that...ha ha).
Still have to deal with inside the cabin next and get everything tidy and put back together in there.
The non skid cured hard as a rock over the long weekend. The paint rep said I should get up to 15 years life out of it!
Last edited by a moderator:
Similar threads
- Replies
- 35
- Views
- 4K
- Replies
- 24
- Views
- 2K
- Replies
- 25
- Views
- 2K