What Did You Do To Your Boat This Week?

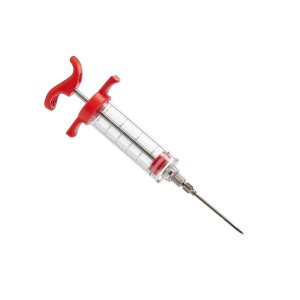
Yesterday I spent the day in the bilge. Replaced the electric bilge pump with an automatic one, which barely fit. I love my Arima but whoever designed the bilge access deserves a kick in the butt. Installed a "backup plan" while I was at it. The hose on this manual pump can reach anywhere in the back of the dance floor and into the in-floor fish box and bilge access. Under normal circumstances it is on a quick release with the pickup in the splash well. I ride a little butt heavy so the theory is I can use it to get some water out of the splash well in a following sea.

1000001465.jpg

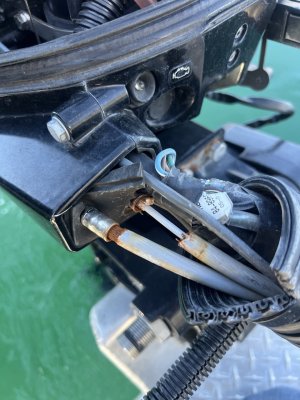
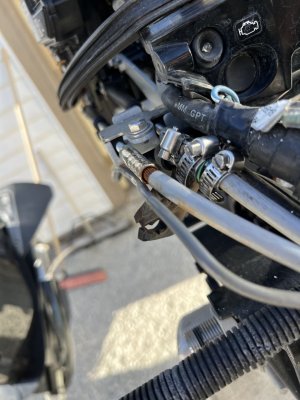
And today I sea trialed the kicker steering connection I made up this winter. Worked exactly as intended. It was pretty dead calm out there today though, we'll see how it does in sportier conditions.

1000001464.jpg
 
Finished getting the kicker dialed in. Troll Master installed, and prop guard.

1000001474.jpg
1000001473.jpg
1000001472.jpg
1000001471.jpgStarted prepping my transom for trim tabs install. I have 5 scew holes to fill below the water line first, from the transducer and the old speed sensor. I know epoxy would be a quick water proof fix, but is there any other options that might be a closer colour match to my gelcoat? Inhave zero fibreglass experience so far.
 
Finished getting the kicker dialed in. Troll Master installed, and prop guard.

View attachment 104315
View attachment 104316
View attachment 104317
View attachment 104318Started prepping my transom for trim tabs install. I have 5 scew holes to fill below the water line first, from the transducer and the old speed sensor. I know epoxy would be a quick water proof fix, but is there any other options that might be a closer colour match to my gelcoat? Inhave zero fibreglass experience so far.
Can you send a pic of what the tiller looks like?
 
You mean the tiller arm on the kicker? You can see it in my post from yesterday a few back. Unless I am misunderstanding the request.

Ya was just curious how it looked once installed the trollmaster was installed. Is the tiller arm fully disconnected now? I have one but I’m torn to install it as I like having all the controls right there on the tiller arm as I find it helps with fishing solo.
 
Ya was just curious how it looked once installed the trollmaster was installed. Is the tiller arm fully disconnected now? I have one but I’m torn to install it as I like having all the controls right there on the tiller arm as I find it helps with fishing solo.
It has no impact on the tiller arm what so ever, as far as I can tell. I haven't actually fired up the motor, but watching the mechanics of the throttle rod its pretty obvious that its designed so you can use either one - the troll master or the normal tiller throttle. If you look at the middle picture I posted, and look at the end of the throttle rod - you'll see it is kind of a rectangle shape. And the top edge of the rectangle is right up against the stud from the tiller arm assembly. So if you use your normal tiller throttle, it pushes against that back edge of the rectangle and works just like the stock throttle rod. Now look at the other end of the rod - that wire wrapped around the same stud is connected to the Troll Master servo. It pulls on the throttle in the opposite direction. Troll master pulls, throttle rod pushes. When the troll master pulls, the rectangle at the other end of the throttle rod just slides, and has no impact on the tiller throttle. If you use the tiller throttle the cable from the troll master just slacks up a bit.

Probably not making it very clear in the explanation - there are Youtube install videos that probably show it better. Or go to their website and look up the installation kit instructions for your specific kicker. Mine was the TM216 kit. And I have the old school dial Troll Master as shown in the pic, which I picked up second hand. I don't know if the newer digital/wireless ones work exactly the same - but I imagine they do since I think its the same hardware kit either way.

I think with this and the steering bar I made up, I have a pretty flexible setup now for both solo fishing and with a partner. The steering bar is two quick releases and comes off in about 5 seconds, and as I explained the throttle can be controlled either from the troll master or the tiller. So if I am solo, I can leave the bar off and do everything from the throttle, or if I have a partner the bar can go on and speed control from the helm. Or some combination of that. I think I could conceivably even pop the kicker end of the steering bar off with one hand if I decided to in the middle of fighting a fish.
 
Finished getting the kicker dialed in. Troll Master installed, and prop guard.

View attachment 104315
View attachment 104316
View attachment 104317
View attachment 104318Started prepping my transom for trim tabs install. I have 5 scew holes to fill below the water line first, from the transducer and the old speed sensor. I know epoxy would be a quick water proof fix, but is there any other options that might be a closer colour match to my gelcoat? Inhave zero fibreglass experience so far.
Uh, fill with gelcoat? I don't have much marine fiberglass experience either but filled a high puncture on my hull with gelcoat. Bought some off white and hardener and was super easy. If you're close to Nanaimo your welcome to come take what you need. That goes for anyone else, probably will go to waste otherwise.
 
Uh, fill with gelcoat? I don't have much marine fiberglass experience either but filled a high puncture on my hull with gelcoat. Bought some off white and hardener and was super easy. If you're close to Nanaimo your welcome to come take what you need. That goes for anyone else, probably will go to waste otherwise.
That's super generous, thanks. It's not so much the expense that I am afraid of - course like everything else I expect the materials will cost more than I want to pay. I just get overwhelmed when I start reading about all of the different resins, epoxies, mat, adhesives, sealants etc. and the process involved in using them properly. Get worried I'll either select the wrong formula for the job, mix it wrong or box the execution. And holes in the transom are the last place I wanna screw it up.

I'm not so much worried about making new holes - pick the right sealant (most likely 4200) and bed the fittings properly. That I've done before. Making existing holes dissappear and stay disappeared and water tight, that's where I think a little of the artistry starts to come into it. Especially on my nearly 30 year old cream colored gel coat.
You are likely overthinking. For the holes, ream them out a little with a drill. Make certain the holes are dry. Mask around them. Mix up MarineTex. Epoxy does a better job than gel-coat. They make an off-white. Thin it a bit with acetone. (If you chill this mix in a fridge the cure slows down.) Put that into a marinade syringe ($10) and pump the hole slightly over-full. After it cures, trim the excess flush with a sharp chisel. If you don't like the color, use Krylon paint over the entire area.
 

Attachments

  • master-chef-marinade-injector-ec13853a-e9e5-4281-9890-bdd57da861bc-jpgrendition.jpg
    master-chef-marinade-injector-ec13853a-e9e5-4281-9890-bdd57da861bc-jpgrendition.jpg
    29.6 KB · Views: 3
I rigged it up until I can get a new shifter cable for my kicker. I sandwiched some 1/16” stainless steel cable inbetween all the clamps. Seems to work fine for now.
 

Attachments

  • IMG_3883.jpeg
    IMG_3883.jpeg
    206.2 KB · Views: 39
  • IMG_3884.jpeg
    IMG_3884.jpeg
    178.2 KB · Views: 39
You are likely overthinking. For the holes, ream them out a little with a drill. Make certain the holes are dry. Mask around them. Mix up MarineTex. Epoxy does a better job than gel-coat. They make an off-white. Thin it a bit with acetone. (If you chill this mix in a fridge the cure slows down.) Put that into a marinade syringe ($10) and pump the hole slightly over-full. After it cures, trim the excess flush with a sharp chisel. If you don't like the color, use Krylon paint over the entire area.
I happen to have most of a tube of West Six10 on hand. Would that do the same job as the marine tex, and is it paintable?
 
That's super generous, thanks. It's not so much the expense that I am afraid of - course like everything else I expect the materials will cost more than I want to pay. I just get overwhelmed when I start reading about all of the different resins, epoxies, mat, adhesives, sealants etc. and the process involved in using them properly. Get worried I'll either select the wrong formula for the job, mix it wrong or box the execution. And holes in the transom are the last place I wanna screw it up.

I'm not so much worried about making new holes - pick the right sealant (most likely 4200) and bed the fittings properly. That I've done before. Making existing holes dissappear and stay disappeared and water tight, that's where I think a little of the artistry starts to come into it. Especially on my nearly 30 year old cream colored gel coat.
Ya I hear you! There's a lot to learn.
You are likely overthinking. For the holes, ream them out a little with a drill. Make certain the holes are dry. Mask around them. Mix up MarineTex. Epoxy does a better job than gel-coat. They make an off-white. Thin it a bit with acetone. (If you chill this mix in a fridge the cure slows down.) Put that into a marinade syringe ($10) and pump the hole slightly over-full. After it cures, trim the excess flush with a sharp chisel. If you don't like the color, use Krylon paint over the entire area.
Thanks for that information.
 
I happen to have most of a tube of West Six10 on hand. Would that do the same job as the marine tex, and is it paintable?
Yes and yes! Actually painting over is great. It protects epoxy from U.V. Just ensure it's well cured (a week) and rough it up slightly prior to painting. Clean with acetone. When working with epoxy remember it's chemistry - correct proportions and thorough mixing (2 minutes, at least) are essential. Do not rush.

If you are working on a bigger job use slow cure or chill the mix first. Epoxy cures on a curve - it speeds up as it starts to cure (exothermic reaction creates heat) then slows down. Give it time. Mix small batches and spread the mixing area out in a small, disposable pan so it doesn't heat up too much, even put the pan over ice. Use a silicone spatula and wear gloves.
Well, got the West Six10 in. I tried to use a syringe but it was a little too thick to pick up, so mostly I ended up pushing it in the hole with a spreader stick. Letting it cure over night and will take a look at it tomorrow to see if I trust my own work. As it turns out, of the 5 holes only 2 of them will be visible... the other ones will be hidden by the trim tab bracket. I figure with the epoxy in there already and some liberal use of Sikaflex when I mount the trim tab, I should be ok. The other two I can assess once they are cured up, and if I don't trust 'em drill out and redo. Or have them taken care of proper next time I have the boat at the fibreglass shop for more extensive work.
 
Well, got the West Six10 in. I tried to use a syringe but it was a little too thick to pick up, so mostly I ended up pushing it in the hole with a spreader stick. Letting it cure over night and will take a look at it tomorrow to see if I trust my own work. As it turns out, of the 5 holes only 2 of them will be visible... the other ones will be hidden by the trim tab bracket. I figure with the epoxy in there already and some liberal use of Sikaflex when I mount the trim tab, I should be ok. The other two I can assess once they are cured up, and if I don't trust 'em drill out and redo. Or have them taken care of proper next time I have the boat at the fibreglass shop for more extensive work.
It's important to keep water out of the wood core. You should be fine at the tabs. For the other two, your plan is sound. Remember that these days, many shop personnel have no more experience than you do and they don't care as much.
 
Back
Top