
You are using an out of date browser. It may not display this or other websites correctly.
You should upgrade or use an alternative browser.
You should upgrade or use an alternative browser.
Project boat
- Thread starter powerplant
- Start date
quote:Originally posted by wolf
Here is what my pod looked like I was told to follow the bottom of the boat (i dont know why specifically) maybe LC knows
On a heavier boat, you want to follow the bottom to make the boat behave like a longer boat, longer boats are easier to dock, and the bow stays down better as your centre of gravity is shifted forward. However, for boats that are very heavy in the bow, like most modern walk-arounds like Grady and Wellcraft, they step the hull up to lift the motors higher for speed. I tried that with my rig and wound up having the pod re-worked to be smooth with the bottom of the hull, too much see-sawing as the boat looked for it's COG.
victoriaboater
Active Member
Another way to look at it is like a fulcrum and lever. The motor is the lever torquing the bow up on the transom (fulcrum). The farther the prop is from the end of the transom (or Pod) the more power is driving the aft end of the boat down into the water. Therefore, to ensure that power is used to propel the boat forward and not drive it down into the water you want your power as close to the boat as possible; hence extending the bottom profile of the boat through to the end of the pod. Not to mention it helps take the torque off the transom and applies the power as a lateral load acting directly through the entire length of the hull during acceleration. Lastly the thicker your pod the harder it will be to torque it off because you have more surface area holding it on.
S
scottyboy
Guest
any new pics of your progress on the reno. i`m enjoying the refit
powerplant
Member
quote:Originally posted by scottyboy
any new pics of your progress on the reno. i`m enjoying the refit
Should be able to get back to it this week for a couple of days.
Have been trying different methods for stripping the paint, sanding, scraping. Anyone ever try powerwashing paint off. All suggestions considered.
B
bhemi
Guest
Try soda blasting if you have a vendor close to you. Make sure he starts slow and keeps his distance. DIY Boater magazine had an article on it a few issues back.
powerplant
Member

Pod glassed to the boat.

One more round of fill and sand and it should be ready for primer.
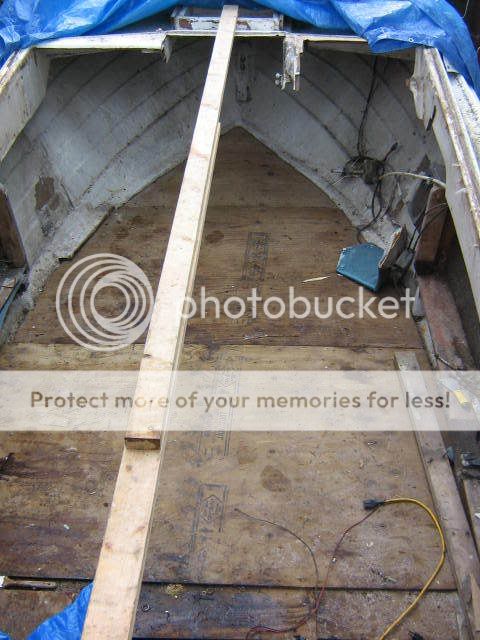
Floor is about half done, I'm using two layers of half inch.

Before paint stripper.

After one application of stripper, you roll it on and wash it off.


Next time I"ll let it sit longer and use a pressure washer to rinse.
M
Mongoose
Guest
whats the boat getting for power?
powerplant
Member
quote:Originally posted by Mongoose
whats the boat getting for power?
Something that's reasonable inexpensive (used) in the 115 to 175 HP.
If anyone has an engine sitting collecting dust I'm willing to take it off your hands
 .
.I hope you have some bolts through that pod too! A straight pull is the weakest form of a fiberglass or epoxy bond.
powerplant
Member
quote:Originally posted by LastChance
I hope you have some bolts through that pod too! A straight pull is the weakest form of a fiberglass or epoxy bond.
I have 18 S.S. bolts helping to keep it in place. I was trying to make it look as if it was molded in one piece.
That should be plenty of bolts. My only other thought would have been to use epoxy glass to fair it to the transom as epxoy can be a bit more flexible, but then again, you have a nice radius there. It will look good when it is done.
S
scottyboy
Guest
wouldn`t it be a good idea 2 take off the pob glass the whole unit a couple times then mount it and glass 2 the haul? i would think it would be stronger plywood might badly crack with alot off power and might fall off . just glassing 2 the hull might not be enough. but i`m not a glass guy and i might be wrong
He's got lots of bolts, it should be fine. Most plywood transoms are not constructed as well as that pod is, and the bonus with his pod is you don't have to worry aout water ingress through the top of it, unlike most outboard transoms that don't glass the top where the deck meets the transom.
S
scottyboy
Guest
but isn`t it only bolted through the plywood thats against the transom? what about all the wieght 2 feet behind it i.e motors ect. just curious is all
S
scottyboy
Guest
he will need a hatch in the top of the pod i.e bolting on the power ect
reelendealen
Member
Good point scottyboy, your going to need a hatch for bolting the lower part of the motor to the pod, the two top bolts are fine. I have had a couple of pod's none made out of wood, but, especially with wood you should have a water tight inspection deckplate so you can open and check for any rot or stress cracks from the inside. Or, if there is a void if any water is inside ie. water through the bolts of the motor or something.
powerplant
Member
I guess I should have posted a lot more pictures.
The pod is glassed all around, the back thats against the transom was glassed before bolting in place. I also used a couple of tubes of that great 3m glue. There was a section left open so that I could get the bolts in. After bolting it was closed up and lots of cloth and epoxy resin applied. I was leaving the access hatch and drain plug until after painting. I preped for the drain plug by drilling part way through with an inch and a half bit from both sides and then drilling through with one inch. Then I taped one side and filled the hole with thickened resin, so when I install the drain plug it will be drilled through epoxy not wood.
The pod is glassed all around, the back thats against the transom was glassed before bolting in place. I also used a couple of tubes of that great 3m glue. There was a section left open so that I could get the bolts in. After bolting it was closed up and lots of cloth and epoxy resin applied. I was leaving the access hatch and drain plug until after painting. I preped for the drain plug by drilling part way through with an inch and a half bit from both sides and then drilling through with one inch. Then I taped one side and filled the hole with thickened resin, so when I install the drain plug it will be drilled through epoxy not wood.
S
scottyboy
Guest
is glass in the inside worth doing???
powerplant
Member
quote:Originally posted by scottyboy
is glass in the inside worth doing???
All the joints on the inside have 2 layers of cloth and the ply was flood coated with resin, I wanted to eliminate the chance of moisture getting to the wood as much as possible.
Similar threads
- Replies
- 16
- Views
- 2K
- Replies
- 0
- Views
- 202