Derby
Crew Member
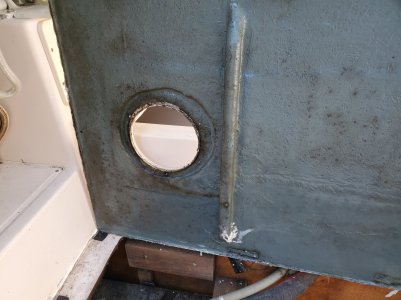
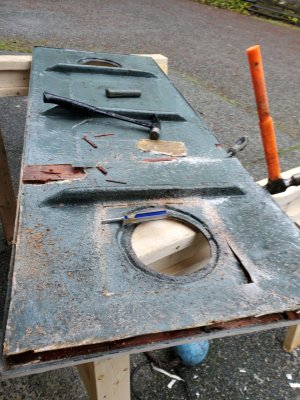
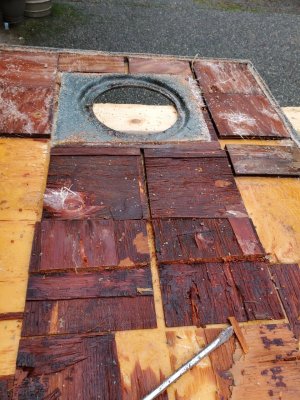
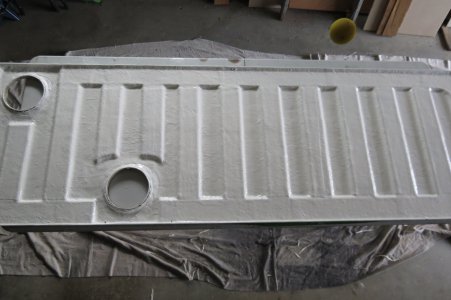
The center flooring started to get spongy. so it is time to pull the panel and replace the rotten ply wood and re glass so more in.. Not sure if there is any other options to replacing it just marine ply wood ...thoughts?
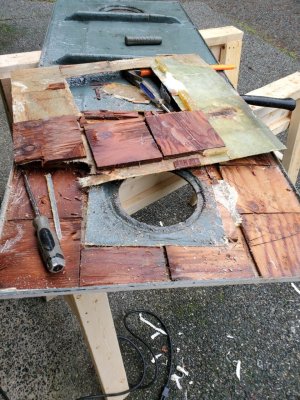
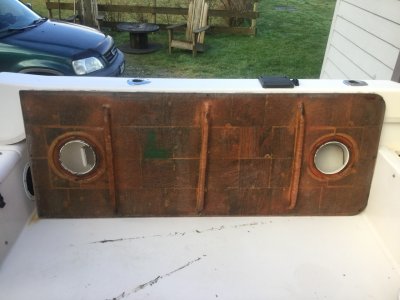
Your panels look like they were painted at one point on the underside, here’s what mine look like on my SeafarerThe center flooring started to get spongy. so it is time to pull the panel and replace the rotten ply wood and re glass so more in.. Not sure if there is any other options to replacing it just marine ply wood ...thoughts?
It sealent on top of the glass to seal it I believe... this is what Grady did for 232 grady i believeYour panels look like they were painted at one point on the underside, here’s what mine look like on my Seafarer
You used a solid sheet... I will need to put a couple more cross bratches in this time... looks good what you did there..I found some pictures to show what I did,but many ways to skin a cat.
")
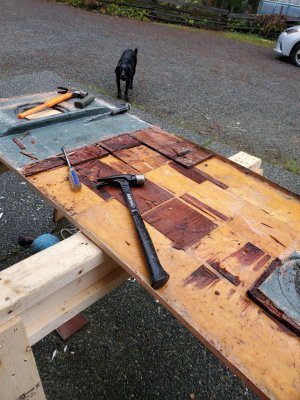
I have nothing of value to add other than the lab looks like he's about to pounce.
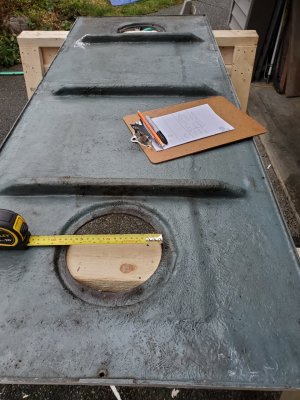
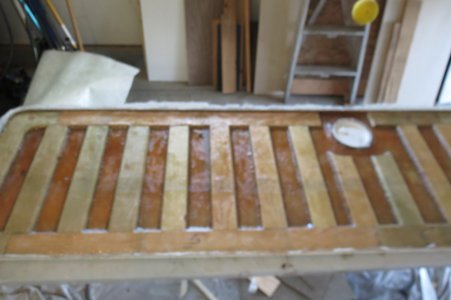
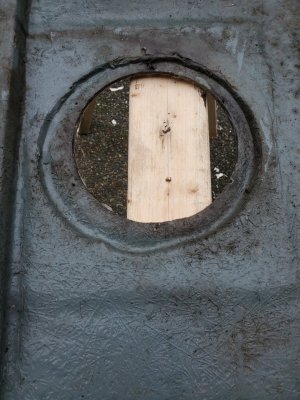
interesting.. thank youI did that same job (Fuel tank hatch cover) on a 2470 Pursuit I had last year.Mine was saturated balsa core that I stripped out completely. I chose to replace it with 3/4" ply that I cut into about 4" strips run across the hatch and bevelled at 45*and scored the bottom on my table saw.. I saturated the ply strips with resin all round and next day bedded them in a mat and thickened resin mix and weighted them down.I spaced them about 4" apart and glassed them in with mat/cloth/mat full length/width of hatch in pieces not 1 piece.I weighted the hatch down to a flat surface while curing to keep it flat/straight.I then drilled out the screw holes (Fastener holes) to about 1/2" (in the plywood only) and filled with epoxy.Next day drilled the screw holes out to fit new stainless screws about 3/16",gelcoated underside and done. You can simply cut a one piece of ply to fit,but I don't think it's as good because you can't be sure of how well it bonded, (air pockets).
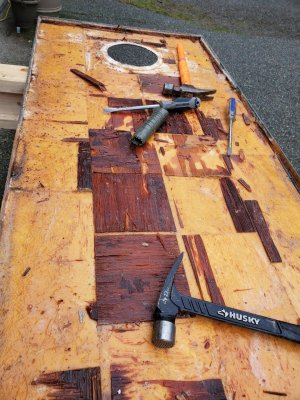
No ,I didn't use a solid sheet,the spaces between the plywood strips is just solid fiberglass made at least twice as thick by my overlapping glass. Doing it this way essentially builds up a fiberglass beam every 4"and your guaranteed adhesion to the hatch fiberglass.The plywood is fully encapsulated ,so it can't rot.The fastening holes is what caused this problem,so surrounding those holes with epoxy will keep it from happening again.You used a solid sheet... I will need to put a couple more cross bratches in this time... looks good what you did there..
They just cheap and use scraps left over, if done right one piece of ply (make sure it’s bone dry) drill a few small holes in it to let air pockets out when you laminate to the glass shell, then glass over done, last for a long time, how do I know ??? Don’t ask lolI would agree, the only reason I could see them doing that would be to allow some flex and prevent cracks? get @Rayvon in here...
EDIT: oh well look at that timing