My Neighbours Hate Me!

Matthias

Well-Known Member
Despite not contracting Covid-19, these unprecedented times provided me with a sense of ambition that hopefully won’t come and bite me in the butt!

What do you get when you put together a pandemic, a very supportive finace, and a second floor condo with a 30 sqft patio? The perfect opportunity to learn how to fiberglass! My neighbors probably hate me by now as I’ve provided them with hours of harmonious sanding and grinding for the past week, but the end is near, and I’m hoping the heavy lifting is mostly done with.

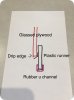
I’m about halfway through the process of re-building my inboard engine hatch. The process has already taught me a lot about fibreglassing and through this experience I’ve developed a VERY strong appreciation for the professionals in this industry.

Before moving on, I want to send a shout out to Rob Snyder who has been a bottomless pit of knowledge, and has been so positive in responding to my 5000 questions. You Rock!!
 
The plan is to fiberglass the entire hatch, paint it, and add a non skid surface to the top. I’ll also have a removable cushion made for the top. I plan to add plastic runners to the bottom edge (maybe 3-4”?), and cover the bottom edge of the runners with a rubber U-Channel to prevent water from seeping under the hatch into the engine. The plan for glass is 2 layer of 1.5oz chop strand on the underside, sealed with gel-coat, and 1 layer of 1708 sandwiched between 1.5oz CS in the top side. The sides will be primed and painted and the top will contain the non-skid surface.
 

Attachments

  • _9.JPG
    _9.JPG
    56.5 KB · Views: 118
Step 1 involved removing the old vinyl and foam to see what kind of condition the underlying plywood was in.

There was one major section that contained rot. The entire bottom edge of the hatch felt structurally okay, but was distinctly blacker in color than the rest of the wood. Cut away the rotten section and 4” trimmed off the bottom edge. I used 5/8” ACX plywood to patch the section that was removed due to rot. The box was in good enough condition for me to feel comfortable to move forwards. In hindsight, I 100% should have started from scratch and built the whole thing instead of salvaging it. The combination of sanding, void filling, and glue removal were not worth it (in my opinion). Either way. I kept it, and moved on.
 
I'm having real issues posting photos. I tried compressing images to the 300-500kb range but it still wont accept them. Any ideas?
 
I’m going to glass the underside first. I removed hundreds of staples, and sanded my but off to remove all the old glue

I used PL glue to get rid of the 90 deg angles and to give it a nice radius.
Screen Shot 2020-05-05 at 10.22.38 AM.png Screen Shot 2020-05-05 at 10.22.51 AM.png Screen Shot 2020-05-05 at 10.22.44 AM.png Screen Shot 2020-05-05 at 10.22.29 AM.png
 
Ok now it's glass time. Never done this before.. 2 Layers of 1.5oz chopstrand matting on the underside. I used Polyester resin mostly for cost purposes. Its must cheaper than epoxy and for a project this size, from what i read poly will work just fine.
Dry fitting the glassScreen Shot 2020-05-05 at 10.26.07 AM.png Screen Shot 2020-05-05 at 10.26.00 AM.png
 
First layer laid and i have some real problems.. The glass did not want to go around the edge, and i was left with one massive air bubble.. across the whole edge.. For the other edges, i decided not to try to wrap around, instead i made sure i got proper adhesion to the face. I will go back later and trim off the excess, and seal all edges with a few coats of resin.Screen Shot 2020-05-05 at 10.26.52 AM.png Screen Shot 2020-05-05 at 10.26.58 AM.png
 
So off to home hardware to buy a grinder! This is when i started turning heads in the complex.. Hey, it's a Tuesday i'm allowed to make some noise :)
Screen Shot 2020-05-05 at 10.30.19 AM.png
 
I was getting these weird white spots in some areas.. They weren't air bubbles, but according to some research (and Rob) this is what happens when you don't properly coat the plywood before adding the glass. Lesson learned, if in doubt go over the wood twice with resin before adding the glass. Screen Shot 2020-05-05 at 10.30.59 AM.png
 
After laying that up, i coated the resin with waxed gel-coat to let it fully cure. I'm not too worried about the aesthetics of the underside. I'm very happy I did this side first. It gave me a chance to learn how the material works, and how to best work with it. My very first pour of resin was close to a litre.. I made maybe 20 brush strokes before the bucket of resin already started to set and get hot... I wasted about 750mL right there.. Lesson learned, 250mL at a time was working well for me. Screen Shot 2020-05-05 at 10.35.01 AM.png Screen Shot 2020-05-05 at 10.35.18 AM.png Screen Shot 2020-05-05 at 10.35.10 AM.png
 
I'm going to come back and seal the edges once the top side is gel-coated. I know it's not pretty, but hey, first kick at the can.. The top will be better I promise!! i hope... The thing is waterproof thats what matters :)
 
Flip it over and let's get started on the top.. I was using 80 grit to sand the surface to prep for glass, but i was having real issues with the old plywood. Likely around 20 years old ( i know i know i should've build it from scratch). The wood had a bunch of grooves that weren't going away with sanding, so i bought a filler from windsor plywood to make a uniform surface. Once it was laid, i sanded her down and she was ready for glass.. Screen Shot 2020-05-05 at 10.39.22 AM.png Screen Shot 2020-05-05 at 10.39.30 AM.png
 
Back
Top