Lorne Parker's melting pot.

Sculpin, I basically grabbed scraps of metal from around the shop. It leaks a little, but I just keep a drip pan close at hand.

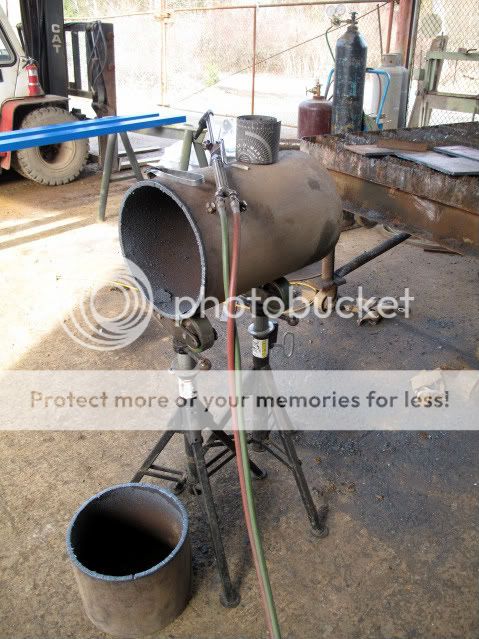
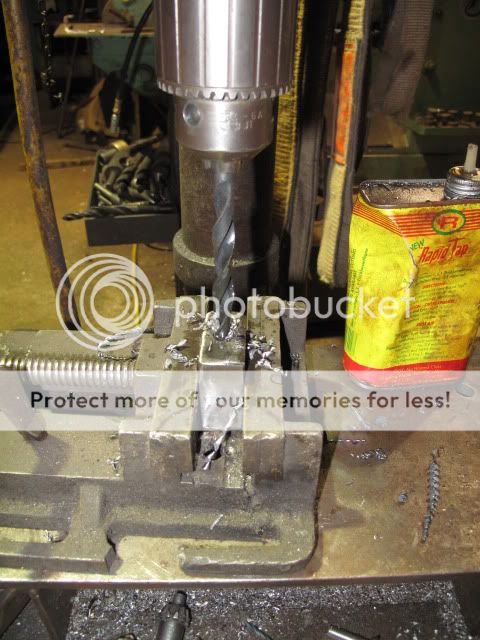
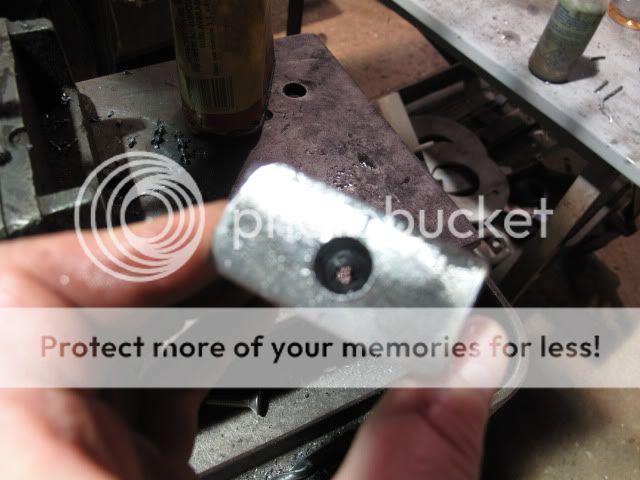
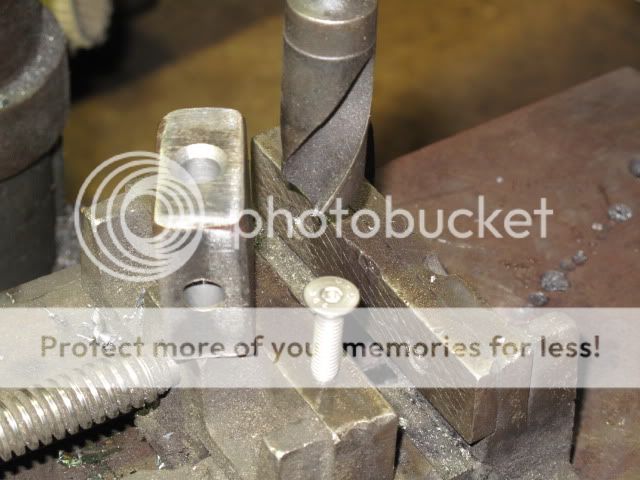
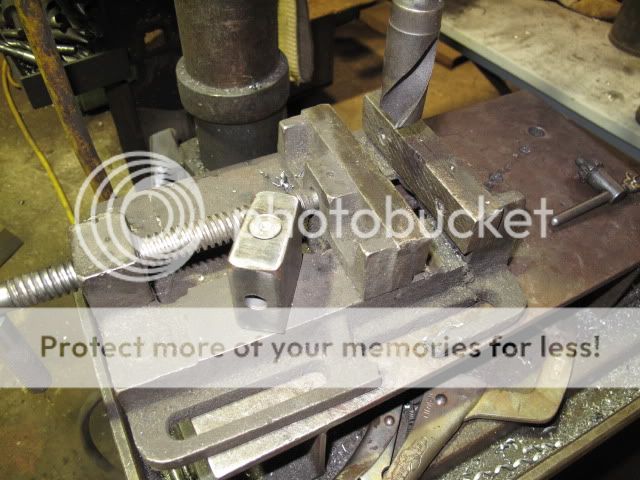
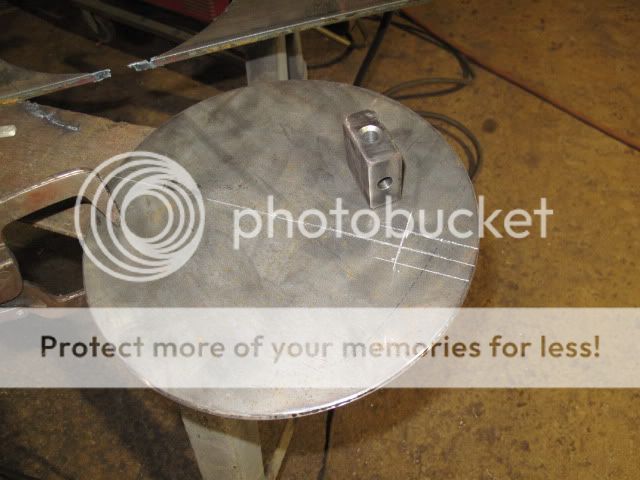
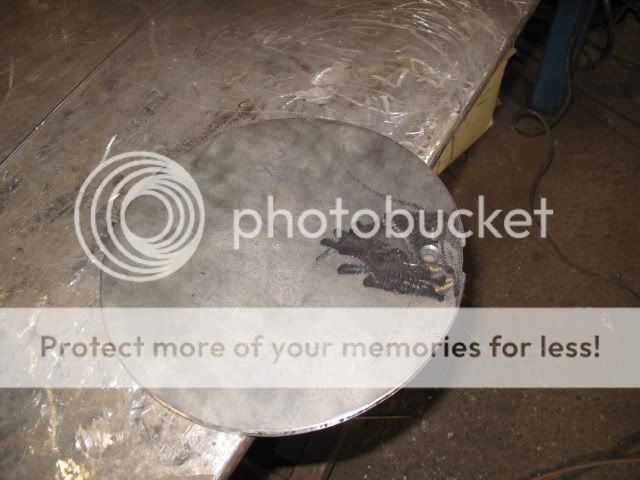
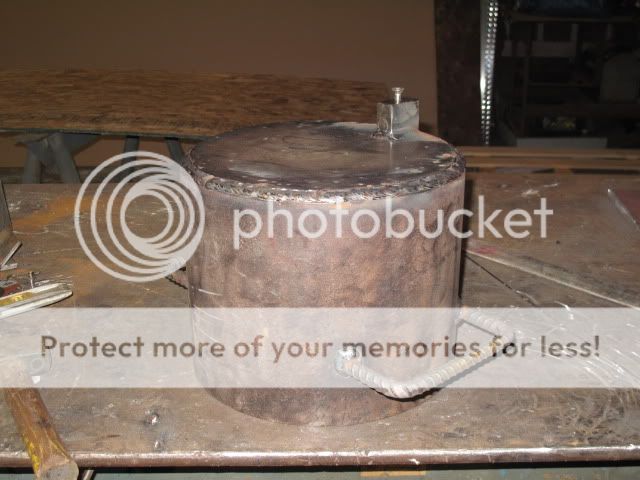
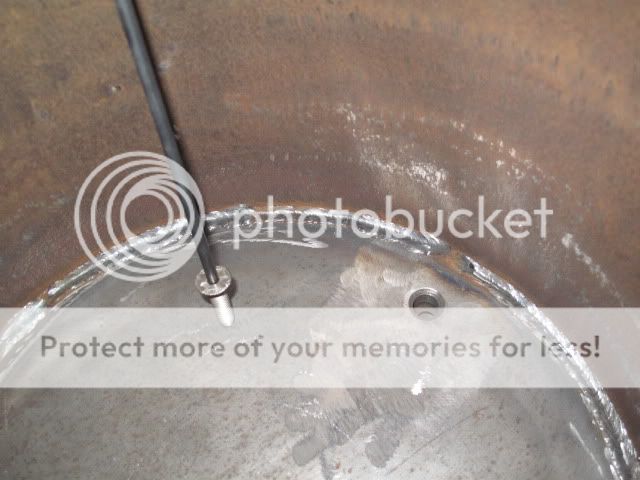
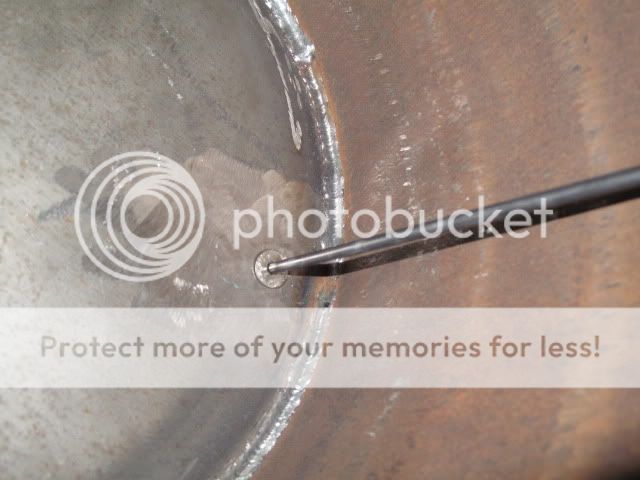
Drilled a 1/2" hole into the cast pot, as well as into a piece of approx. 1x1" steel cube. Took a piece of 1/2" OD pipe, bent a 90 degree curve on it (as seen in pic) and inserted the other end through the 1x1" metal, so it stuck out the back an 1/8" or so. The 1/8" sticking out I then inserted into the 1/2" hole I drilled into the pot and tacked the 1x1" piece to the pot itself. As far as the simple valve, I drilled a hole through the top of the 1x1" piece (sized to the ID of the pipe that I inserted horizontally into the 1x1" piece) deep enough that the drill tip would pass all the way through the ID. Then I took a piece of steel rod, the same size as the drill used and inserted it vertically into the valve mechanism. This rod lifts up and down using the 4" bolt I welded on for a handle (you can see a welded washer that acts as a stop against the lip of the cast pot so I don't pull the rod right out)....When I lift the rod I get a flow of approx 3/8" stream of lead, suitable for pouring my bigger downrigger balls (10-20lbers). Once I lower the rod to close the valve, I get a slow leak from the spout but I simply hold a piece of cold steel against the spout and thats generally enough to solidify the lead at the tip of the spout and that stops the minor leak. I keep a small blow torch at hand to heat up the valve mechanism to start the flow again (takes 5 second). To clean any lead out of the pot or mechanism I simply apply head and melt it out. Blow me away how quickly lead liquifies.

Cast pot came from Walmart or ArmyNavy for $25

ALL THAT BEING SAID (and I hope it made sense)...If I were to do it again I would go to the plumbing store, and buy 1/4" npt cast elbow with an inline ball valve (all metal, no rubber o-rings) and I'm willing to bet it works just as well...with the parts already readily available.

In the end took just over an our before I had the torch under my pot melting my first batch.

A Mcguyver of sorts when it comes to scrap metal and being cheap! haha
 
I decided to go with steel for the pot and all the accessories that are going along with it. I tried a few different countersunk pin in the hole type valve idea's for the bottom but wasn't happy with them. I found a cooler valve system on the castboolits website (lot's and lot's of info on there for casting FYI). I hope to have it almost done tomorrow and will post some pic's for sure.
 
Well it is almost done. A little thing called my wife's birthday got in the way lol.

I basically used this guy's idea for the valve in the bottom.

http://castboolits.gunloads.com/showthread.php?t=49483

I put it flush to the bottom of the pot like he said he would do next time.

Anyways here are some pic's FWIW.

How do you start to build a high capacity melting pot? Start with a chunk of 12" sched40 pipe.

IMG_2159.jpg


Then cut a bottom out for it.

IMG_2160.jpg


Make up a couple of heavy duty handles for Lornes big mitt's lol.

IMG_2162.jpg


Continued...........
 
Here is the diagram I printed off and the chunk of 1" x 2" x2" plate for the valve.

IMG_2168.jpg


Drilling out the first pilot holes.

IMG_2170.jpg


Drilling out the larger holes.

IMG_2172.jpg


I have to plug weld that little hole in the back. It is basically cross drilled now and ready for tapping for the valve screw.

IMG_2173.jpg


Continued.....
 
Last edited by a moderator:
This is basically the end product. The countersunk machine bolt act's as the valve. The hole in the front of the block is where the lead will come out.

IMG_2179.jpg


IMG_2174.jpg


Welding it in the bottom of the pot.

IMG_2180.jpg


IMG_2183.jpg


Continued...
 
Ground smooth after welding. It is welded on the other side as well.

IMG_2185.jpg


Bottom tacked on and handles welded on.

IMG_2186.jpg


First pass.

IMG_2187.jpg


Second pass.

IMG_2193.jpg


Continued....
 
Last edited by a moderator:
Ok so this is just a mock up for how this will work. I don't have the right length of taper head machine bolt and I will use a slightly larger diameter rod for the "valve stem".


IMG_2197.jpg


IMG_2198.jpg


Here is the little angle I welded on for now to see how it works.

IMG_2204.jpg


Here is the unit sitting in my crab cooker burner just for demo sake.

IMG_2203.jpg


I should have it totally ready to go by tomorrow with a few more tweeks and a homemade ladle for back up. I have read of a few folks that have used this system and it does work. We'll see I guess. Anyway's Lorne I'll PM you my shopping list for sinkers lol. I sure hope a lot of folks will benefit from this little contraption. It was fun making it.

Cheers,
John


Disclaimer: There were no boyfriends involved in the making of this pot. Use pot at your own risk. Always wear proper personal safety equipment when working with molten lead. For further information regarding this melting pot visit www.sculpinprojectsandfriends.com lol.
 
Last edited by a moderator:
nice job indeed, Lorne should be very pleased, pretty lucky guy,
I hope you made a drawing to keep on file,
I laughed like hell when I read your disclaimer, way too funny, I actually clicked the link thinking maybe....... ah nevermind lol
but seriously nice work man
Tim
 
Nice job, I'm impressed.
GLG
 
I guess that countersunk screw just sits in the hole hey? and you just lift it up a little for pouring then, its not actually threaded in?
it needs some sort of a stopper/limiter to stop from being pulled all the way out, might have a hell of a time shutting off the flow should you accidentally pull it too far out or am I not seeing something? maybe a piece of flat steel across the top with a hole drilled through it then a washer welded to the valve stem rod 1/2 inch down or so, then when you lift it, it can only come up till the washer hits the flat steel? sorry sculps just thinking out loud
slap me if I'm off base
Tim
 
Last edited by a moderator:
I guess that countersunk screw just sits in the hole hey? and you just lift it up a little for pouring then, its not actually threaded in?
it needs some sort of a stopper/limiter to stop from being pulled all the way out, might have a hell of a time shutting off the flow should you accidentally pull it too far out or am I not seeing something? maybe a piece of flat steel across the top with a hole drilled through it then a washer welded to the valve stem rod 1/2 inch down or so, then when you lift it, it can only come up till the washer hits the flat steel? sorry sculps just thinking out loud
slap me if I'm off base
Tim

It's best to just click on the castboolits link I posted. It explains it pretty good. I did a few things differently for obvious reasons.

The bolt is threaded into the lower half of the block. It can't come out unless you unscrew it too far but you won't be doing that as the flow will be to much. I'm thinking a half to one full turn. I'm just going from what other folks have done. Lorne will have to do the lead trials and let us know how it works. The guy says he just heats up the whole works and it works great. Time will tell with the threads etc. The only thing he says is when the pot is empty and free of lead and it is going to sit awhile to WD40 the threads so they don't rust up.

I think I have around 5 hours into this thing but I must have doubled that cruising casting forums. There are alot of countersunk pin in the hole type units out there with counter balance weights etc. and they still drip. Hope this works. I researched high temp ball valves and other types of gas valves etc. with nothing coming up that will handle the heat without dripping.

Lead has a much higher viscosity than water so I'm sure it won't leak out the bottom of the block through the threads.

Cheers,
John
 
Last edited by a moderator:
I get it now, I didnt realize it was tapped out in the lower section of the block so the countersunk bolt screws in with a larger opening up top to allow flow,
nice idea I can definately see that working. now you got me thinking I might want to start making my own balls as well
Tim
 
Hey Sculpin, .org has been promising to build me a shed for the Striper.....................
Just saying....... PM me for the address...".. LOL
Nice jesture by the way, Bravo, hope to meet you on the water some day.

SS

BUMP.......LOL

Great job Sculpin, I think Lorne had better line up more than one duck shoot for this baby! You shouldn't have to buy cannon balls for awhile. I hope you nail a 100 lb. hali on your first trip this year.

SS

SS
 
Thanks for the boolit link, I am starting to load blackpowder and lots of info. The pot you made looks super and am starting that project myself.
 
Great Work Sculpin.

Very similar design to the LEE system, with the bottom pour plunger style plug. Awesome!

Look forward to hearing of Lorne's results.

Safe pouring!
 
Great Work Sculpin.

Very similar design to the LEE system, with the bottom pour plunger style plug. Awesome!

Look forward to hearing of Lorne's results.

Safe pouring!

Thanks FB. I looked at the plunger style similar to a Lee or others but opted for this design. Go to the link I posted and you can see better how it works. It actually screws in to lock it in the closed position.
 
ok, go ahead and get some lead in that POS, thought it was gonna be stainless, no cooking in that thing, u guys suck, i had about 300lbs of cheeze for a fondue, whatever, u suck sculpin,lol..........:D:p.....holmes*

LOL............want some wine with that?:D:p
 
Last edited by a moderator:
Back
Top