2021 JaxonCraft Build Thread

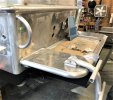
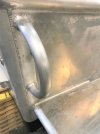
Two photos on the rear door today.

This one shows the inside latching mechanism


and this one shows the latch to hold the door open. Note that the latch is at the top of the door not on the deck

View attachment 72009
My son won’t be able to reach that! It will kill the resale ;)

Here is the way to do beach landings at 2:00. PS @Raincity

I just use anchor buddy, a swim grid/ladder and stern tie for beach exits. Much easier for 1-70 year olds in my opinion then jumping of the bow or even going down a long ladder.

Boats looking good, I see Xmas or NY prawning in your future.
 
A couple more photos this morning.

The rear stern seat (snap on and off cushions).

The Yeti 65 Cooler will have two homes on the boat.

Centred in front of the stern seat, and snuggled up against the portside inwhale at the folding table. We bought the Yeti tie down kit for each spot.

Note the drains for the fish cleaning /bait board at the back of the seat.

1635967584520.jpeg


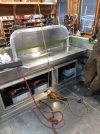
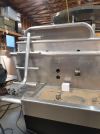
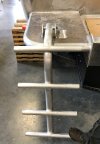
Stern Boarding Ladder. (still under construction) There will be a handrail of sorts on one side. Note the self draining design. :D

1635969149114.png
 
My son won’t be able to reach that! It will kill the resale ;)

I just use anchor buddy, a swim grid/ladder and stern tie for beach exits. Much easier for 1-70 year olds in my opinion then jumping of the bow or even going down a long ladder.

Boats looking good, I see Xmas or NY prawning in your future.

Well if he is your son he will be able to buy the boat and make suitable modifications. :D

I am all for not jumping off any bow, hence the self bailing stern ladder.

I expect that we will see prawning in the New Year.

And it would be nice to putz around with the parade of Carol Boats but that will be next Christmas.
Great looking ladder and bait/filet table. What a build!
 
Saturday was a visit with Robert and talk about the build.

I will try to write about the photos they are not my best work. I always plan to bring a decent camera with me and then think oh my iPhone will be fine, then I am looking at the lighting and think why didn't I take a decent camera.

So let's start with the stern ladder. One of my pals was concerned whether or not this would be a strong enough mount .

Trust me Robert had me test the ladder and the hand rail. It will be just fine. Did I mention the ladder is self draining? :D

Ladder Up

1636345750850.jpeg

Ladder down

1636337682147.jpeg

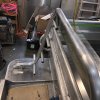
Ladder down with Boarding Handle shown. It was an easy reach to the handle.

1636337746408.jpeg


1636337918142.jpeg
 
Last edited:
Waiting for the Rat Fur to be installed.

Once the Cabin insulation is fully installed (1" thick 3M something) the inside of the cabin walls and ceiling will be lovingly covered with a wonderful material that is known in the trade .as "Rat Fur."

1636338537981.jpeg


Robert showed me the reading lights that will be installed so "one of us will be able to read at night" while the other is not sleeping "because of the light still being on".
 
Saturday was a visit with Robert and talk about the build.

I will try to write about the photos they are not my best work. I always plan to bring a decent camera with me and then think oh my iPhone will be fine, then I am looking at the lighting and think why didn't I take a decent camera.

So let's start with the stern ladder. One of my pals was concerned whether or not this would be a strong enough mount .

Trust me Robert had me test the ladder and the hand rail. It will be just fine. Did I mention the ladder is self draining? :D

Ladder down

View attachment 72105

Ladder down with Boarding Handle shown. It was an easy reach to the handle.

View attachment 72106


View attachment 72107
That handle is great! We had a swim ladder installed on ours this summer, I think it's shorter than your and it is hard to pull oneself up. I ended up using the rear rope to offer support for boarding, but this is a super idea....now to think about it all winter....
 
So now we get to the seat placement and dash.

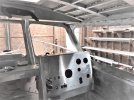
I had a vision of a nice smooth dash with everything in one central command centre... but the Furuno is too deep and now is going to live up above on a mount (see mount in photo)

It will be angled towards the dash, the way I took the photo is crap and I had to paly with the picture to burn out the shadows by overexposing it.

The two Suzuki 4" LCDs take the top two hols on the right and the engine controls will be mounted on the panel as well, I can't remember which spot. Robert wanted to give me more room between the seat and the cabin wall and to do that the controls will be mounted on the dash panel. The trim tab controls will be mounted on the starboard top of the dash and the MOB system will be mounted on the opposite side.

Now my wife is 5'3" so having to move the Furuno unit up high has caused a challenge, and one I hadn't thought of till today as I was writing this. I don't think she will be able to reach the screen and that may be an issue. I think Furuno has a separate controller, or perhaps we will have to buy a 9" unit and mount it in the dash (unless it is too thick ) and somehow slave them together.

I am leaving that in Robert and Gavin from Sea Comm Marine Electronics capable hands.

1636341760481.jpeg


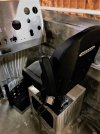
We did some test positioning of the pilot seat and it needs to be a little higher up and mounted at the back of the seat box.

The shock wave adjustable foot rest will work well for my wife and I so we can both have good foot bracing rather than one of us being really uncomfortable and/or the other having no foot support

1636344033860.jpeg

Funny Story, I was just ready to leave and I had one of those cold rushes of fear run down my spine. I looked at Robert and said, the seats are black that is the wrong colour. My wife had ordered a custom colour in May when we toured the Shockwave factory . We knew the seats had arrived but I hadn't seen them yet.

The good news is the black Shockwave seat was for another build. Our seats had been checked by my wife and Robert a month ago when they had arrived and they were in storage and the correct colour.
 
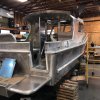
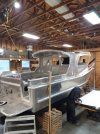
Here is a quick shot from the stern forward. The downrigger mounts are installed, the rear door needs to be installed and all of the inspection ports need to be closed up.

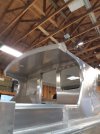
You can see along the rear cabin roof bolt holes, They are where the Grab handles will be mounted, the same on the rear quester panels on the sides (rod holders) and on the roof prawn/crab/dingy rack and electronics tower. They will all be bolted on after the cabin is wrapped, making the job easier for the wrap crew now and in the future if we or a new owner decide to change the colour of the cabin or just redo the existing wrap.

All of the racks, holders and handles, etc. have been powder coated. It is Robert's attention to detail and his willingness to listen to my my wife's questions and work with her on the things that are important to her that has made the build so much less stressful and more enjoyable/

1636344779224.jpeg


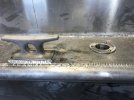
A final photo. Robert and I were talking about where to store the landing net. I took his advice and it is going to be held in a vertical holder in the gunnel. (yes it has a drain ). Look at the quality of workmanship the and attention to detail paid to this little part of the build , I know I should have wiped down the gunnel top before taking the picture. It is behind the cleat so it won't get fouled up in a line and it looks just great.

1636345586141.jpeg
 
We got our letter from Transport Canada and our vessel name has been reserved and is unique to us.
I expect that things will finish up on the build mid December and then she will be off to Breakers Marine for the engine install.

Robert has run all the cables and lines for the marina to the transom. cut the dash opening for instruments and controls. Upholstery is almost finished and the windows have a shipping date of December 3rd.

The Radar mast looks great and we have all the electronics ready for install

The racks , etc. are back from the powder coater and look great.

Cabin insulation is complete and the first interior primer coat has been applied.

We were over and saw the build on Sunday. Interestingly, Robert was quite impressed with the Shock Wave adjustable foot rests They will really work well for my wife and I due to our different heights, With the tilt steering wheel, sliding and swivel (swivel co-pilot seat only ) Shock wave mounts and platforms we are making the boat as ergonomically flexible as possible.

This will make the boat more comfortable for us and help with the boat's future resale value .

Robert was showing me the Blue Sea panel for the cabin. When we plug in for shore power there is an inverter to run to charge the batteries somehow (forgive me I have very limited electrical knowledge (shocking, I know) and can only speak in what we want to happen ), and two wall plugs with 120 to run the winter dehumidifier, winter moorage heater and of course the hot tub heater and pump (just kidding).There are also the correct switches to do things and a meter.

We (my wife, Robert, and I ) had another discussion regarding the mounting of the flag pole. Now the flag pole is very important to me because a boat needs to fly the National Flag properly. We will be taking the boat south into the US and flying the Canadian Flag is important.

Equally important to me is the fact that my late wife's dad (who I was very fond of) made over 100 crossing of the North Atlantic in convoy escort (Corvettes and Frigates ) he made a lot of Murmansk runs and was twice sunk . He was a great guy , and deeply scared by the war. I have to fly our flag with as much honour and stateliness as possible.

Of course the cost of the flag pole is ridiculous ( Burwiin flag pole mounts).because I want to be able to remove it when fishing and it has to look sharp for JEK.

The Cabin Wrapper (I finally know a Wrapper) was up to see Robert and was pleased that so many of the exterior cabin fittings will be bolted on after the wrap. Robert did this to make the wrap process as easy as possible with less fiddley work. Again thinking of future rewraps and/or resale.

I was going to hold off on posting more photos until the build is complete (sans motors) but then I thought we post progress not perfection.
 
Last edited:
A couple of photos from today

Cabin innards are in and paneling is up (sans trim)

1638391454269.jpeg


You can see the inside cabin light in this one. Oak trim still to be installed in cabin.

We are making progress. Robert said that our build is quite complex and he laughs that my wife and I have only had one area where were needed to make a compromise, (and I did).

It was on the physical placement of the stern flagpole. :D

1638391535868.jpeg
 
So all of a sudden things are just racing along on the build. All the bits and bites are falling into place.

So what's what.

The windows are scheduled to arrive tomorrow at Roberts and be installed.

We are still waiting for the Rat Fur (that lines the v-birth ) to show up. It is apparently on a truck somewhere.

The electronics are P&P (Purchased and Poised) for installation.

The upholstery and seats are ready for install, and the bait board is awaiting installation.

Let's start with the inside and work our way out, shall we.
 
Last edited:
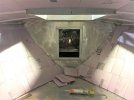
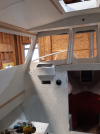
The cabin walls are insulated, paneled and trimmed out.

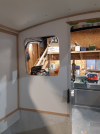
View - Starboard rear corner looking out through window opening. In house electrical panel box will be wall mounted somewhere in this area (I think).

1638509208220.png


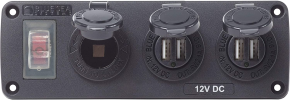
Co-pilots seat box, trim, power panel for recharging electronics.

Round black shape is heater outlet (I had to ask as well)


1638509456333.png

Blue Sea Systems Water-Resistant Accessory Panel - 15A Circuit Breaker, 12V Socket, 2X 2.1A Dual USB Chargers

1638509397116.png


Mounting holes for Shock Wave adjustable foot rests at bottom of photo

Grab bar not yet installed (see mounting holes) each side of glove box.


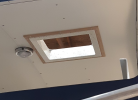
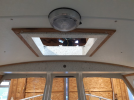
Cabin roof hatch trimmed also showing cabin light.

1638510004980.png
 
Last edited:
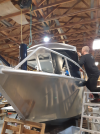
It's a Wrap !!!

Note to reader. Robert will be bolting through the wrap to install the roof rack , handholds, and rocket launchers.


1638510102910.png


1638510061005.png


1638510187588.png

We had no idea that the gunwale extensions would add a nice line of colour. This was a pleasant surprise.

The boat name will be silver on the blue stern wrap and our port will be in blue letters below on the silver transom.

1638510244562.png
 
Last edited:

Origin of a name /word

Early 19th century; earliest use found in William Nicholson. From classical Latin alūmin-, alūmen alum + -iferous, originally after French aluminifère.

Containing alum or aluminum. metal, metallic - containing or made of or resembling or characteristic of a metal; "a metallic compound"; "metallic luster"; "the strange metallic note of the meadow lark, suggesting the clash of vibrant blades"- Ambrose Bierce.

Alum-bearing, yielding alum. In later use also: containing alumina.

Word origin Collins Dictionary

-i- is the typical ending of the first element of compounds of Latin words, as -o- is of Greek words, but often used in English with a first element of any origin, if the second element is of Latin origin. Other words that use the affix -i- include: Frenchify, cuneiform; -ferous is a combining form meaning “bearing,” “producing,” “yielding,” “containing,” “conveying,” used in the formation of compound words. Other words that use the affix -ferous include: coniferous, pestiferous
 
Last edited:
@Bill 310 - do you have any heater duct outlet blowing onto your windshield in front of the helm seat?

In the mornings you'll want some heat blowing on it to keep it clear of condensation. You may need to T off the existing salon venting if not already in place. Easy to do now.
 
@Bill 310 - do you have any heater duct outlet blowing onto your windshield in front of the helm seat?

In the mornings you'll want some heat blowing on it to keep it clear of condensation. You may need to T off the existing salon venting if not already in place. Easy to do now.


Yes that is being done, I just don't have any photos as of yet. We also have two marine fans (that means more expensive and I am to optimistically believe they will have a long and salt water based reliable life) that will provide additional air on the windscreens.

There is so much to do, I am glad we never built a house (just did renos). Robert is a steadying hand through this process.
 
Last edited:
So of course near the end of a build things start to really zip along.

Today's photos

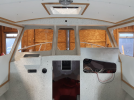
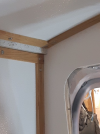
The trim work continues to be finished and the light oak trim really sets itself off in the boat and will look very nice once the seats, cushions and backrests are installed.

1638578428296.png


I just noticed part of the dash mount is in the boat.

1638578476726.png


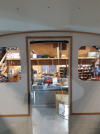
Stern door and windows trimmed out. Windows should arrive shortly.

1638578744532.png


1638578634903.png
 
Back
Top