"CHUBBY" mods/projects

sometimes lol...but I definitely don't force my buddies to stand in the room with me when I do! haha
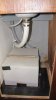
It really is an awesome design of a boat. With my long arms, I could take a s**t and make breakfast at the same time. Wonder how the Capt. likes his eggs?
 
Great looking everything thus far CZ. Does the sleeping quarters have a curtain of some sort to offer privacy when sleeping with two on board, in the case that someone needs to use that newly installed head in the middle of the night? lol how bout a cabin exhaust system?

Can't wait to see her for myself..

privacy and a bit of smell was definitly one of the compromises I made with down sizing to this boat from comfortzone...Im thinking the use of this toilet will be more in the case of emergency, or just to be polite to the people in the anchorages (not whipping it out on the swim step, lettn'r rip while their kids are swimming in that same water...lol)...I know even the enclosed head in the 2452 rarely was used for #2, we tended to use shore facilities where possible...but it was there when you need it..

btw, the exhaust system will be those large sliding seaglaze windows...and I will take my eggs scrambled...haha
 
haha awesome stuff. First trip out though, Im going to punish that Jabsco....lol
 
Starting to come together

today permanently installed head, finished all plumbing for galley and head, except discharge from macerator to thru hull (hose on order), had to get creative with the discharge "Y" from tank to macerator and pumpout fitting...a visit to rona solved the issues of tight corners and kinking sanitation hose...FYI if working with this hose dont be without a heat gun to soften ends to slide over fittings...the loop from the toilet to the tank is to prevent back flow (syphoning) from holding tank through the head in a heeled position, the tank is higher then the head outlet. water intake to head came from rear bilge where ther is an existing thru hull/sea-**** for the washdown pump, T'd into that hose.

installed new fuseblock as I will be adding some circuits, and existing block was full...also installed circuit breaker and polarity reversing switch at the helm for macerator, I find macerators blow fuses to often so went with the accessible breaker, the reversing switch allows to pump out waste and also suck in clean water, to clean/flush waste system..

installed over head fan, and finished off access hatch for holding tank/macerator
 

Attachments

  • chubby mods 032.jpg
    chubby mods 032.jpg
    85.5 KB · Views: 320
  • chubby mods 034.jpg
    chubby mods 034.jpg
    92 KB · Views: 318
  • chubby mods 035.jpg
    chubby mods 035.jpg
    88.2 KB · Views: 321
  • chubby mods 038.jpg
    chubby mods 038.jpg
    93.2 KB · Views: 317
  • chubby mods 037.jpg
    chubby mods 037.jpg
    87.3 KB · Views: 315
  • chubby mods 040.jpg
    chubby mods 040.jpg
    103 KB · Views: 329
  • chubby mods 041.jpg
    chubby mods 041.jpg
    93.2 KB · Views: 312
  • chubby mods 042.jpg
    chubby mods 042.jpg
    95.2 KB · Views: 300
  • chubby mods 045.jpg
    chubby mods 045.jpg
    97.9 KB · Views: 311
FD i can't take credit for the fuseblock on top, that was wired in when I purchased the boat, I installed the lower block which still req's to be wired
 
A few small things done today, mostly wiring...

epoxied and painted plywood bench and installed with cushion

installed macerator to thru hull discharge hose

wired in macerator, installed/wired reversing switch, and circuit breaker

installed and wired in windlass helm switch and reversing solenoid for windlass

installed and wired in light for holding tank compartment...placed above the tank, when on makes the level of the tank visable
 

Attachments

  • chubby mods 049.jpg
    chubby mods 049.jpg
    91.7 KB · Views: 269
  • chubby mods 052.jpg
    chubby mods 052.jpg
    95.9 KB · Views: 276
  • chubby mods 051.jpg
    chubby mods 051.jpg
    99.2 KB · Views: 276
  • chubby mods 054.jpg
    chubby mods 054.jpg
    93.5 KB · Views: 273
  • chubby mods 053.jpg
    chubby mods 053.jpg
    104.5 KB · Views: 279
  • chubby mods 055.jpg
    chubby mods 055.jpg
    89.3 KB · Views: 266
  • chubby mods 047.jpg
    chubby mods 047.jpg
    94.9 KB · Views: 272
At this pace, I'm thinking so. Chubbs is the ultimate under 20' fishing boat. Can't believe what's been packed into this package.
 
thanks man

...actually when I sit at the helm to mock stuff up or even step back from the work and look/think about what it is capable of, and the possibilities in such a small package I cant help but smile...especially since it feels like you can reach the yami and the windlass at the same time when sitting in the helm LOL...Im pretty excited
 
It coming along great CZ. I like that fan for defogging the windows, the cushion seat turned out great, and the light for the compartment is a very nice addition. I need to add some lights up front in my cubby compartment.
 
thanks sculpin...if your intrested the light shown is a camco, an RV/marine company (same as my propane heater) seems to be good quality... picked it up at can tire for $9.99, with the built in switch can't go wrong for that price..makes for an easy install too. and uses the same bulbs all my interior/dome lights used in the cabin on both my boats
 
I will be looking forward to a report on your propane heater. What was the cost on that thing again? I will need to move some warm air to defrost my Tomato-grower windows lol
 
FB the propane heater itself came with the boat, unsure of the cost, everything up to that tank, reg, gauge, fittings ect. was under $200

not sure if propane heat will be good for clearing windows...it tends to add a slight fog when the heater is on...not fure if you pair propane heat with a defog fan if it would work, I need to test that

in -5deg I turned it on and the cabin was comfortable in 10-15 minutes...at the helm(near the heater) you could not see your breath, not toasty warm but definitly took that edge off...only tested it for 20-25 minutes...im sure in in 30-40 with keeping the door sealed it will be nice

As long as it is vented properly like an RV etc. it should be good. The fan is a must and crack a window to let the "wet" heat out. Diesel or kerosene heat is a lot dryer than propane heat.
 
As long as it is vented properly like an RV etc. it should be good. The fan is a must and crack a window to let the "wet" heat out.

good to know, I have heard diesel heat is much dryer but the boat came with this heater so thought I would give it a whirl...and I can't justify $2-3k on a heater...not yet anyway
 
Its coming together...

Installed all wiring for windlass, heavy gauge directly from battery switch, circuit breaker at transome, reversing solenoid at the helm and ultimatly to windlass (which still need to be installed and pulpit built)...also installed and wired foot switches at the bow, and wired rocker switch at the helm, both to command the solenoid...

Leak tested holding tank, once satisfied installed floor and captains chair over holding tank compartment....and as you can see the light inside the compartment works like a charm to monitor tank level...simple and convienient

built a steering arm for the kicker which alows it to be connected at all times, with each motor in any position...before with kicker in up position, main down and cranked to the right, the tie bar would come in contact with parts on the kicker, potentially causing damage...I dont plan on keeping it on at all times just makes for ease of use when pulling gear and changing locations, or if heading out in poor conditions it can be installed at the dock to avoid climbing on the swim grid etc...

last but not least, small addition of the scotty rod holders off the aft rails...this will also serve as a mount for the BBQ
 

Attachments

  • chubby mods 061.jpg
    chubby mods 061.jpg
    95.9 KB · Views: 254
  • chubby mods 081.jpg
    chubby mods 081.jpg
    97.4 KB · Views: 254
  • chubby mods 077.jpg
    chubby mods 077.jpg
    97.7 KB · Views: 253
  • chubby mods 080.jpg
    chubby mods 080.jpg
    97.7 KB · Views: 253
  • chubby mods 064.jpg
    chubby mods 064.jpg
    98.3 KB · Views: 267
  • chubby mods 065.jpg
    chubby mods 065.jpg
    93.8 KB · Views: 256
  • chubby mods 072.jpg
    chubby mods 072.jpg
    99.3 KB · Views: 257
  • chubby mods 074.jpg
    chubby mods 074.jpg
    88.4 KB · Views: 257
  • chubby mods 069.jpg
    chubby mods 069.jpg
    91.9 KB · Views: 254
  • chubby mods 071.jpg
    chubby mods 071.jpg
    90.5 KB · Views: 252
  • chubby mods 075.jpg
    chubby mods 075.jpg
    91.6 KB · Views: 253
  • chubby mods 082.jpg
    chubby mods 082.jpg
    86.8 KB · Views: 253
what else?
 
Back
Top